Forget Brown Thumbs! Let’s Crack the Code to Killer Indoor Herb Gardens in Your Windows

Alright, fellow plant lovers and aspiring culinary wizards, let’s get real. How many of us have proudly brought home a vibrant basil plant, only to find it looking… well, sad a week later? 🙋‍♂️ We’ve all been there. Windowsills seem like prime herb real estate, but without the right setup? It’s a fast track to Plant Hospice. But what if we told you your dream of snipping fresh rosemary for Sunday roast is totally doable? Let’s nerd out over indoor herb garden window solutions – no PhD in botany required.

Indoor Herb Garden Window Solutions

(Psst… we’re D&D Home Remodeling, your San Jose-based home-whisperers. We’ve seen kitchens where herbs thrive and others where they barely survive. Spoiler: Good design is everything.)

Why Your Herbs Keep Ghosting You (And How to Fix It)

Look, herbs aren’t trying to be dramatic. They just need three things: light, drainage, and space. Fail at one, and they’ll peace out faster than you can say “moldy soil.”

Light is non-negotiable. Most herbs crave 6+ hours of direct sun. South-facing windows? Goldmine. North-facing? You might as well be raising mushrooms. If your window’s more “cozy gloom” than “sun-drenched oasis,” grow lights are your BFF. Pro tip: LED strips under cabinets look slick and keep parsley perky.

Drainage disasters are the silent killers. That cute ceramic pot without a hole? It’s a herb coffin. Always. Use. Pots. With. Drainage. Or get crafty with a layer of pebbles at the bottom (but really, just get the right pot).

DIY Hacks vs. Pro Moves: When to Call Reinforcements

Wanna throw up a shelf? Stick some hooks in the wall? Go for it! DIY is awesome for:

  • Magnetic planters on steel window frames
  • Tiered shelves (IKEA hacks, anyone?)
  • Hanging mason jars (rustic chic, but watch for water stains)

But… if you’re dealing with:

  • Weight concerns (soil + water + pots get HEAVY)
  • Structural changes (like widening a window or adding outlets for lights)
  • Aesthetic integration (seamless built-in planters? Yes please.)

…that’s when you tag in a pro. IMO, paying for expertise beats a collapsed shelf any day. Cue our shameless plug: At D&D Home Remodeling, we bake functionality into beauty. Imagine a custom bay window with built-in herb trays and subtle lighting – all part of a kitchen remodel or exterior remodeling project. FYI, it’s way more abortable to plan this upfront than fix a DIY gone wrong later.

Your Herb Garden Style Menu: Pick Your Vibe

|| Solution Type | Best For | DIY Level | Cost (Approx.) |
|—————|——————-|————–|—————|———————|
| Hanging Pots | Renters, small spaces | Easy | $20-$50 |
| Window Shelf | Maximizing light | Medium | $50-$150 (plus tools) |
| Built-In Planter Box | Permanent, high-impact | Pro | $300-$800+ |
| Hydroponic System | Tech lovers, low-mess | Medium | $100-$300 |

Got a blank wall near a window? Vertical pocket planters (like felt wall gardens) are space-savers. Sunny but narrow sill? Rail planters clip right on. The price varies wildly, but cost isn’t just cash – it’s time spent troubleshooting.

The “D&D Special”: When Herbs Meet Home Remodeling

Here’s where we geek out. As a full-service remodeling contractor in San Jose, we don’t just slap shelves on sills. We design for herbs:

  • Window expansions to flood your kitchen with light.
  • Custom recessed planters with auto-drainage (no more soggy roots!).
  • Integrated irrigation for those who forget to water (no judgment).

Thinking bigger? Pair your herb window with a kitchen renovation or bathroom remodeler project. Yep, even bathrooms can host mint for mojitos! We serve San Jose, Santa Clara, Campbell, Milpitas, Saratoga, Sunnyvale, Los Gatos, Cupertino, Fremont, and Morgan Hill. Why settle for “good enough” when your window could be a functional showstopper?

Keep ‘Em Alive: No-BS Maintenance Tips

  • Water like a pro: Stick your finger in the soil. Dry? Water. Damp? Wait. Overwatering murders more herbs than neglect.
  • Prune or doom: Regularly snip leaves (even if you don’t need them). It encourages growth.
  • Rotate pots: Prevent lopsided, sun-chasing plants.
  • Skip the fertilizer frenzy: Herbs aren’t greedy. A light feed every 4-6 weeks is plenty.

Pro warning: Tap water in Santa Clara County can be harsh. Filtered or distilled keeps minerals from crusting up your soil.

Herb-icide 911: Troubleshooting SOS

“Why are my herbs yellow?!”

  • Overwatering (most likely)
  • Not enough light
  • Poor drainage

“Pests! Help!”

  • Aphids? Blast ‘em with water or use neem oil.
  • Fungus gnats? Let soil dry out completely between waterings.

“They’re growing so sloooow.”

  • More light! Or check temps – most herbs like 65-75°F.
  • Root-bound? Time to repot.

FAQs: Your Herb Anxiety, Addressed

1. Can I grow herbs in a north-facing window?
Technically yes (hello, mint and parsley), but they’ll be leggy and sad. Supplement with grow lights or choose shade-tolerant herbs.

2. What’s the cheapest setup?
Reuse containers (yogurt pots + drainage holes), grab $5 herbs from a nursery, and use a sunny ledge. Total cost: Under $20.

3. Do I need special soil?
YES. Regular garden soil is too dense. Use potting mix with perlite for drainage. Your herbs will thank you.

4. Should I start from seeds or plants?
For instant gratification? Buy plants. Seeds are cheaper but test your patience. Pro tip: Basil from seed is oddly satisfying.

Ready to Elevate Your Window Game? Let’s Talk.

Herb gardens shouldn’t be a battle. Whether you’re hanging a few pots or dreaming of a custom window remodel, the goal is the same: fresh flavors at your fingertips. If your space needs a little magic (or a major overhaul), D&D Home Remodeling has your back. We’re not just a general contractor; we’re your partners in creating a home that works for you.

Live near San Jose or the South Bay? Let’s brainstorm how your herb garden could be part of a bigger home transformationkitchen refresh, exterior remodeling, or even home additions. Because why just fix a window when you can reinvent it?

Drop us a line. Let’s grow something amazing together. 🙂

Shine On! How the Right Landscape Lighting Makes Your Home Safer, Smarter, and Way More Stylish

Okay, let’s talk about something we all overlook until it’s pitch black outside: landscape lighting. We get it. You’re thinking, “Lights? Outside? Isn’t that just for fancy gardens or holiday displays?” Nope! Think of it as your home’s secret weapon – it scares off sketchy characters and makes your backyard feel like a five-star resort. Win-win, right? And trust us, at D&D Home Remodeling here in San Jose, we’ve seen firsthand how a smart lighting plan transforms not just yards, but how homeowners feel about their space. It’s more than bulbs; it’s mood, safety, and serious curb appeal rolled into one.

Landscape Lighting For Security & Ambiance

Why Bother With Landscape Lighting Anyway? (Hint: It’s Not Just for Show)

Let’s be real. Tripping over a garden hose in the dark? Not fun. Worse? Not seeing who’s lurking near your garage. Security and ambiance aren’t opposites; they’re partners in crime-fighting and vibe-setting.

  • Security That Doesn’t Scream “Alcatraz”: Bright, motion-sensor floods by entry points? Yes. But strategic path lights and softly lit trees also eliminate shadowy hiding spots. Criminals love dark corners. Take ’em away! We’ve had clients in Santa Clara and Campbell report way fewer “weird noises” after a lighting upgrade. Funny how that works.
  • Ambiance That’ll Make Your Neighbors Jealous: Picture this: String lights over the patio, subtle uplighting on that gorgeous oak tree, gentle path markers guiding the way. Suddenly, your 8 PM coffee feels like a Tuscan getaway. It’s about extending your living space outdoors, making every evening feel intentional.
  • Hello, Property Value! Good lighting is like a facelift for your home’s exterior. It highlights architecture, makes landscaping pop, and screams “well-maintained” to potential buyers. Bonus: It’s way more fun than re-grouting the shower.

Your Lighting Toolbox: Fixtures, Flair, and Function

Not all lights are created equal. Picking the right tool for the job is half the battle. Let’s break it down:

Path & Step Lights (The Unsung Heroes)

These low-level warriors line walkways, driveways, and stairs. They prevent face-plants and guide guests safely. Go low-voltage LED – energy-sippers that last forever. Pro tip from our crew: Space them evenly (about 6-8 feet apart) and avoid blinding guests. Soft, downward light is the goal.

Spotlights & Uplights (The Drama Queens)

Want to make your Japanese maple or stone fountain the star of the show? Spotlights (focused beams) or uplights (ground-based, shining upward) create stunning focal points. Perfect for ambiance and highlighting security-sensitive areas like side gates.

Floodlights (The Security Bouncers)

Motion-activated floodlights are your first line of defense. Place them high (eaves, garage corners) covering key areas: driveways, back doors, side yards. Smart ones (hello, app control!) let you adjust sensitivity so Fido doesn’t trigger a daylight simulation at 2 AM.

Deck & Hardscape Lights (The Subtle Stylists)

Recessed into steps, railings, or retaining walls, these add safety and a sophisticated glow without glare. Essential for turning your deck into an evening oasis.

Downlights & Moonlighting (The Naturalists)

Mounted high in trees or eaves, these cast soft, dappled light downwards, mimicking moonlight. Creates magical ambiance without harsh beams.

Landscape Lighting Fixtures: Quick Comparison Guide

Fixture Type Best For… Pros Cons Ideal Placement
Path/Step Safety, Guiding Footsteps Low-profile, Energy Efficient, Prevents Trips Can be snow-covered/damaged by mowers Walkways, Driveway Borders, Steps
Spot/Uplight Highlighting Features Dramatic Effect, Versatile Needs careful aiming to avoid glare Trees, Sculptures, Architectural Details
Floodlight Security, Wide Coverage Powerful Deterrent, Motion-Sensing Can be harsh if not shielded/smart Above Garage, Corners, Entry Points
Deck/Hardscape Accenting Surfaces Sleek, Integrated Look, Subtle Safety Requires precise installation Steps, Railings, Seat Walls, Patios
Down/Moonlight Natural Ambiance Soft, Romantic Glow, Minimal Visual Clutter Needs tall trees/eaves for mounting Mature Trees, Under Eaves

Planning Your Glow-Up: Design Like a Pro (Without the Pro Stress… Yet)

Throwing lights willy-nilly is a recipe for a hot mess. A little planning goes a long way:

  1. Walk the Walk (At Night): Grab a flashlight. Where’s it pitch black? Where do shadows feel creepy? Where do you wish you could hang out? Map your pain points and dreams.
  2. Layer It Up: Combine fixture types! Path lights for safety, uplights for drama, maybe a few well-placed floods. Layers create depth, interest, and comprehensive coverage.
  3. Zone Out (In a Good Way): Define areas – “Security Zone” (entrances, dark corners), “Ambiance Zone” (patio, garden features), “Functional Zone” (path to shed, BBQ area). Assign fixtures accordingly.
  4. Think Tech & Green: LEDs are non-negotiable. Long life, low energy, less heat. Smart systems? Worth it. Control schedules, brightness, and motion settings from your phone. Turn everything on when you’re coming home late to San Jose from Fremont. Peace of mind is priceless.
  5. Power Play: Low-voltage (12V) systems are safer and DIY-friendlier, but need a transformer. Line-voltage (120V) is for heavy-duty floods or large properties but requires a licensed electrician (cough like us at D&D cough). Don’t zap yourself. Seriously.

DIY vs. Pro: When to Call in the Cavalry (That’s Us!)

Sure, you can grab a kit at the big-box store. For a tiny patio? Maybe. But for a full yard transformation, complex wiring, or integrating smart tech? Calling a professional remodeling contractor saves time, frustration, and potentially costly mistakes.

  • The “Abortable” Factor: Starting a project and realizing it’s over your head? A pro design is modular. You can phase it in – tackle the front path now, add the backyard oasis next year. D&D Home Remodeling specializes in this phased approach. No need to mortgage the house day one!
  • Hidden Challenges: Roots, irrigation lines, rock-hard soil… outdoor electrical work is trickier than it looks. We’ve got the tools and know-how to navigate it cleanly and safely.
  • Design Expertise: We don’t just run wire; we create cohesive, beautiful, effective lighting plans. We know which fixtures withstand Milpitas wind or Morgan Hill fog. We balance brightness and beauty so your yard looks inviting, not like an airport runway.
  • Permits & Codes: Yawn, but vital. We handle all that jazz. Your HOA in Saratoga or Cupertino has rules? We know ’em.

Wondering about the cost? It varies wildly. A simple path light DIY kit? Maybe $200-$500. A full pro-designed, installed system with smart features and premium fixtures? $3,000-$10,000+. Factors include yard size, fixture types/quantity, wiring complexity, and tech level. The best approach? Get a tailored quote. We offer free consultations because guessing games are for casinos, not home projects.

Keeping the Sparkle Alive: Maintenance Made Simple

Outdoor lights take a beating – rain, dust, sprinklers, maybe the occasional soccer ball. Keep them shining bright:

  • Wipe Down: Gently clean lenses and housings a few times a year (more near dusty roads or under trees). Dirt blocks a shocking amount of light!
  • Trim Back: Keep plants from growing over or touching fixtures. Foliage can block light or become a fire hazard near hot spots (less common with LEDs, but still).
  • Check Connections: Especially after heavy storms or landscaping work. Loose wires = flickering lights or dead zones.
  • Bulb Swap (Rarely!): One huge perk of LEDs? They last years. When one finally goes, it’s usually easy.

Your Landscape Lighting Questions, Lit Up

Q: Won’t landscape lighting make my electric bill skyrocket?
A: Not with LEDs! They use a fraction of the energy of old halogen bulbs. A well-designed LED system costs pennies a night to run. Smart controls (timers, motion sensors) save even more.

Q: Is landscape lighting worth it for security if I already have a porch light?
A: A single porch light creates harsh shadows – perfect hiding spots! Strategic landscape lighting eliminates those dark corners, provides layered coverage, and motion-activated floods startle intruders. It’s a team effort.

Q: Can I install landscape lighting myself?
A: Simple low-voltage path light kits? Often yes, if you’re handy. More complex systems involving transformers, buried wiring, multiple zones, or integrating with house power? Strongly recommend hiring a professional general contractor or electrician. Safety first! Plus, pros ensure it looks cohesive and lasts.

Q: How do I prevent my lights from blinding my neighbors (or me!)?
A: Fixture choice and placement are key! Use shielded fixtures that direct light downward or onto the target (path lights, well-shielded spots). Avoid pointing lights directly at windows (yours or neighbors’). Aim uplights carefully into foliage, not across property lines. “Light trespass” is rude!

Let’s Light Up Your San Jose (and Beyond!) Home

Look, we’re D&D Home Remodeling. We eat, sleep, and breathe making homes better – whether it’s a bathroom remodeler project, home additions in Sunnyvale, or exterior remodeling magic right here in San Jose. General remodeling is our jam, and landscape lighting? It’s one of those high-impact, surprisingly transformative projects we absolutely geek out over.

We’re not just another renovation contractor. We’re your neighbors. We understand the specific vibe of Los Gatos gardens, the wind in Fremont, the soil in Campbell. We’ve helped folks in Santa Clara, Milpitas, Saratoga, Cupertino, Morgan Hill, and all over the South Bay turn their outdoor spaces into secure, stunning extensions of their homes. Looking for the best remodeling company to handle the electrical finesse and design eye this needs? That’s us.

So, ready to ditch the darkness and embrace a safer, more beautiful yard? Stop wondering about “landscape lighting near me” or stressing over price. Let’s chat! Give D&D Home Remodeling a call for a free, no-pressure consultation. We’ll walk your property, listen to your goals (security ninja? backyard entertainer? both?), and craft a lighting plan that fits your budget and blows your mind. Let’s make your home shine – literally. 🙂

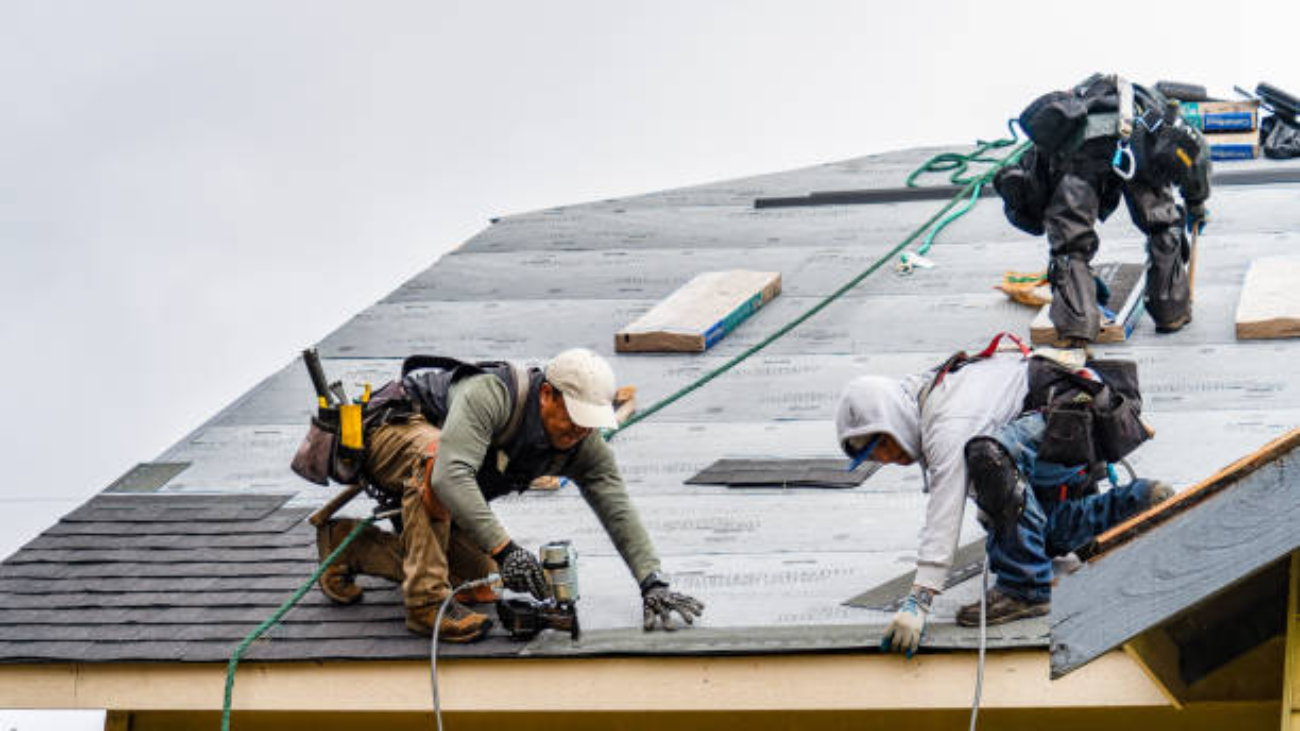
Roofing Company - New Roof Installation

Your Home Sauna Dream? Let’s Make It Happen (Without Melting Your Brain)

Hey there, fellow relaxation seeker! Ever dreamt of stepping into your own personal oasis of heat after a long day? A place where stress evaporates faster than sweat on hot rocks? We get it. As the team at D&D Home Remodeling right here in San Jose, we’ve helped countless folks turn that sauna fantasy into a steamy reality. And let us tell you, it’s way more than just throwing up some wood panels and cranking up the heat. There’s a bit of art and science to it. So, grab a cool drink (you’ll appreciate them more later!), and let’s chat about what really matters when installing a home sauna. Spoiler: It’s not just about picking the prettiest cedar.

Home Sauna Installation Considerations

Why Bother With a Home Sauna Anyway?

Okay, beyond the obvious “it feels amazing” factor? We’ve seen firsthand how a home sauna becomes the ultimate retreat. Clients from Santa Clara to Morgan Hill rave about melting away tension, better sleep, and that post-sauna glow. It’s like hitting a reset button without leaving your property. And honestly, in our busy South Bay lives, who doesn’t need that? Plus, it’s a killer home addition that adds real value. Think about it – would you be more excited about a house with a sauna or without? Yeah, we thought so.

Sauna Smackdown: Choosing Your Heat Champion (Infrared vs. Traditional)

Not all saunas are created equal. Choosing the right type is step zero. Let’s break down the heavyweights:

  • Traditional Saunas (Steam & Dry): The OG experience. Uses a heater (electric or wood-fired) to warm rocks. Add water for steam (Finnish style) or keep it dry. Pros? Intense, authentic heat that penetrates deep. Cons? Higher cost generally, needs robust wiring, heats the whole space, and takes longer to warm up. Perfect if you crave that classic, lung-searing löyly (that’s the steam burst, FYI).
  • Infrared Saunas: The modern contender. Uses infrared panels to heat you directly, not the air. Pros? Lower operating price, heats up super fast, runs on standard outlets, and feels gentler for many. Cons? It’s a different kind of heat – less intense atmosphere, more like direct sunshine. IMO, great for smaller spaces or those sensitive to high humidity/heat.

The Essential Sauna Decision Cheat Sheet

Feature Traditional Sauna (Electric) Infrared Sauna
Heat Type Heats air & rocks (Ambient) Direct radiant heat (Infrared)
Installation Complexity High (Needs 240V circuit, venting) Low (Often plugs into 120V)
Warm-Up Time 30-60 minutes 10-20 minutes
Operating Cost Higher Lower
Temperature Range 150°F – 195°F (65°C – 90°C) 100°F – 140°F (38°C – 60°C)
Humidity Adjustable (Dry to Wet Steam) Very Low (Dry)
Best For Authentic experience, intense sweat Gentle heat, quick sessions, smaller spaces
Typical Base Price $$$$+ $$$

Key Stuff You Absolutely CANNOT Skip (Seriously!)

Alright, the fun part – planning! This is where many DIY dreams go off the rails. As your friendly neighborhood general contractor, we’ve seen it all. Here’s the lowdown:

  • Location, Location, Perspiration: Indoor or outdoor? Spare room, basement, garage corner, backyard sanctuary? Each has pros/cons. Indoor needs serious moisture management. Outdoor needs weatherproofing and maybe a foundation pad. Size matters too! Don’t cram yourself in like a sardine. Allow space for benches and movement. Thinking of converting part of a bathroom? That’s where partnering with an experienced bathroom remodeler who understands steam and moisture (like us!) is crucial.
  • Power Up (Or Get Shut Down): This is the biggie, folks. Traditional saunas are power-hungry beasts. They typically need a dedicated 240V circuit installed by a licensed electrician. Trying to skimp here? Bad idea. Like, “trip breakers and possibly start a fire” bad. Infrared is friendlier, often running on standard 120V, but still needs a dedicated circuit. Cost here involves both the electrical work and potential panel upgrades. Don’t wing this!
  • Breathe Easy: Ventilation is Non-Negotiable: Saunas need fresh air coming in and moist air going out. Proper venting prevents mold, mildew, and that funky locker-room smell. It also makes the experience more comfortable. This isn’t just a hole in the wall; it needs strategic placement and sometimes mechanical assistance.
  • Materials: More Than Just Pretty Wood: Cedar and hemlock are popular for a reason – they resist warping, smell great, and handle heat/humidity. Avoid treated woods or resins that release nasty fumes when heated. Bench material matters for comfort and heat conduction too. Exterior remodeling principles apply heavily for outdoor units – you need durable, weather-resistant materials.
  • Safety First, Sweat Second: Look for heaters with abortable controls (big, easy-to-hit emergency shut-offs), timers, and proper thermal cut-offs. Flooring needs to be non-slip. Lighting should be sauna-rated (heat/moisture resistant). Clearances around the heater are critical – no melting your walls! As a renovation contractor focused on safety, this is non-negotiable for us at D&D.

What Actually Happens During Installation? (No, It’s Not Magic)

So, you’ve picked your sauna type and location. Now what? Here’s a peek behind the curtain at how we, as your house remodeling contractor, roll:

  1. Prep Party (Demolition Optional): Clearing the space. If wiring or venting needs routing through walls/floors, that happens now. For outdoor installations, prepping a solid, level base is key.
  2. The Heavy Lifting: Framing the structure (if building custom), running electrical (by licensed pros!), installing venting ducts.
  3. Building the Box: Installing insulation (crucial for efficiency!), vapor barriers, then the interior paneling and benches. This is where craftsmanship shines – tight seams, secure fastenings.
  4. Heater & Hardware: Mounting the heater (or IR panels), installing the door, lighting, controls, and vents. Everything gets meticulously connected and tested.
  5. Final Steam Test: We fire it up! Checking heat distribution, vent flow, control function, and safety features. Only when it’s perfect do we call it done.

Let’s Talk Turkey: Sauna Costs & Budget Realities

Okay, let’s address the elephant in the steam room: price. How much does this sweat paradise actually cost? Cost varies wildly based on:

  • Type: Prefab infrared kits start lower ($3k-$6k+). Custom traditional saunas jump significantly ($8k-$20k+ easily).
  • Size & Complexity: Bigger = more materials, bigger heater, more labor. Custom shapes or high-end finishes add up.
  • Location & Prep: Need major electrical work? ($1k-$3k+). Building an outdoor enclosure or foundation? That adds cost. Converting an existing space is usually cheaper than a new home addition.
  • Labor: Quality installation by a general remodeling pro like D&D Home Remodeling ensures it’s done right and lasts. DIY might save upfront but often costs more fixing mistakes later. FYI, general contractor rates reflect expertise and insurance.

DIY vs. Pro: Why We Recommend Keeping Your Cool (And Hiring Us)

Look, we admire ambition! But sauna installation isn’t hanging a picture frame. Messing up wiring or vapor barriers leads to fire hazards, water damage, or a sauna that just… doesn’t work. It’s rarely truly abortable once you start cutting holes and running wires if you lack the skills. Unless you’re a licensed electrician and a seasoned carpenter and understand building science… maybe trust the best remodeling company you can find? 🙂 We’ve rescued too many “almost-there” DIY projects in Campbell and Milpitas to pretend it’s simple. The peace of mind knowing it’s safe, efficient, and built to code? Priceless.

Why D&D Home Remodeling is Your South Bay Sauna Soulmate

Alright, plug time – but we mean it! As a premier home remodeling services provider based in San Jose, we don’t just slap saunas together. We approach them as the specialized, high-performance rooms they are. Whether you’re in Saratoga, Sunnyvale, Los Gatos, Cupertino, Fremont, or anywhere in the South Bay, we bring:

  • Deep Expertise: We understand the unique demands of heat, moisture, and electrical loads. We integrate saunas seamlessly into full home remodel projects or handle them as standalone gems.
  • Quality Craftsmanship: We use top-tier materials and proven techniques. No shortcuts. Your sauna should last decades, not years.
  • Stress-Free Process: From initial consultation to final steam test, we manage permits, trades, and timelines. We make it easy.
  • Local Know-How: We know the building codes and climate quirks of Santa Clara County and surrounding areas. Searching for “sauna installation near me“? You found us!

Your Burning Sauna Questions, Answered (See what we did there?)

  1. “How much space do I REALLY need for a home sauna?”
    • Minimum? Aim for at least 4ft x 4ft interior for a small 2-person sauna. Comfortable? 5ft x 7ft or larger is better. Remember height! Standard ceilings are 6.5ft to 7ft inside. Allow space for benches at different heights and clearance around the heater. Don’t forget exterior space for the unit itself, access doors, and ventilation pathways.
  2. “Can I put a sauna in my existing bathroom?”
    • Absolutely! It’s a popular spot. But… it requires careful planning. You need adequate space, robust moisture management (beyond standard bathroom levels), proper structural support (especially for heavier traditional saunas), and upgraded electrical. Working with a team experienced in both bathroom remodeler projects and sauna builds (like D&D!) is essential to avoid moisture disaster.
  3. “How much will my electricity bill increase?”
    • It depends heavily on the sauna type, usage, and your electricity cost. Infrared saunas are generally cheaper to run ($10-$20/month with moderate use). Traditional electric saunas cost more ($20-$50+/month) due to higher wattage and longer heat-up times. Using it daily will obviously increase this. Pro tip: Good insulation significantly lowers running costs.
  4. “How long does a typical sauna installation take?”
    • For a professional installation by a team like ours? A pre-fabricated kit (infrared or traditional) in a ready space might take 2-4 days. A fully custom-built sauna, especially one requiring significant electrical work or structural changes, can take 1-3 weeks. Complexity is the biggest factor. We always provide a clear timeline upfront during consultation.

Ready to Turn Up the Heat (In the Best Way Possible)?

Phew! That’s a lot of sauna talk, but hey, we’re passionate about creating amazing home sanctuaries. Installing a sauna is a significant project, but the rewards – that daily dose of deep relaxation and wellness – are absolutely worth it. It’s an investment in your home and your health. Don’t get overwhelmed by the details; that’s what we’re here for.

If you’re in San Jose, Campbell, Milpitas, Saratoga, Sunnyvale, Los Gatos, Cupertino, Fremont, Morgan Hill, or anywhere nearby and dreaming of your perfect home sauna, reach out to D&D Home Remodeling. Let’s chat about your vision, your space, and how we can make it happen smoothly, safely, and spectacularly. Get ready to sweat the good sweat! Contact us today for a consultation – your personal oasis awaits. 🙂

Valuing-a-Roofing-Company.png

Kitchen Workflow Optimization: Stop Running Marathons Between Your Fridge and Sink

Ever feel like cooking dinner turns you into a frenzied ping-pong ball bouncing between appliances? Yeah, we’ve seen it too—kitchens where grabbing a spatula requires a treasure map and prepping veggies feels like an obstacle course. It’s not you; it’s the layout. Let’s chat about kitchen workflow optimization, because life’s too short for inefficient countertop sprints. At D&D Home Remodeling in San Jose, we’ve rescued enough chaotic kitchens to know a few secrets. Grab a coffee (you’ve earned it), and let’s rethink your space.

Kitchen Workflow Optimization Strategies

Why Your Kitchen Workflow Feels Like a Bad Game of Twister

Seriously, why do some kitchens make simple tasks feel epic? We blame the “accidental design” syndrome—layouts that evolve from hasty decisions or “that Pinterest trend looked cool.” Poor workflow costs you time, energy, and sanity. IMO, it’s the #1 reason clients in Campbell or Sunnyvale call us for kitchen overhauls. Ever opened a dishwasher only to block the oven? Classic workflow fail.

The Golden Triangle: Your Kitchen’s Secret Handshake

No, it’s not a Dan Brown plot—it’s the sacred zone between your sink, stove, and fridge. Nail this, and you’re 80% done. Here’s the deal:

  • Ideal distances: 4-9 feet between each point. Less? You’ll feel claustrophobic. More? You’re marathon training.
  • No traffic jams: Keep the triangle clear of islands or breakfast bars.

We once redesigned a Los Gatos kitchen where the fridge was awkwardly exiled near the patio door. Spoiler: salads shouldn’t require hiking boots.

Beyond Triangles: Meet Your Kitchen’s New BFFs (Zones!)

Modern cooking isn’t linear. Enter activity zones—dedicated spots for prep, cooking, cleanup, and storage. Think of them as specialized teammates.

Here’s a cheat sheet for popular layouts:

Layout Type Best For Workflow? Ideal For Watch Out For
Galley ★★★★☆ Small spaces, 1-cook kitchens Can feel cramped if too narrow
L-Shaped ★★★★☆ Open-concept homes Dead corner storage issues
U-Shaped ★★★★★ Frequent entertainers Overly enclosed if not opened up
Island ★★★☆☆ Social kitchens Islands that disrupt the triangle

Pro move: Your “prep zone” needs landing space beside the sink and stove. No one wants to juggle hot pans across the room.

Storage Hacks That Aren’t Just Deep Abysses

Raise your hand if you’ve lost a ladle to the void behind the soup cans. Smart storage = fewer workflow meltdowns. Try these:

  • Vertical pull-outs: For pots, pans, or that Instapot you use twice a year.
  • Drawer dividers: Because rummaging for a whisk shouldn’t feel like a panic attack.
  • Appliance garages: Tuck away blenders and toasters. Clutter is workflow kryptonite.

We’re big fans of abortable storage solutions—like pull-out spice racks you can retrofit without a full demo. FYI, these are life-changers in older Saratoga homes.

Appliances & Tech: Making Friends, Not Frenemies

Placement matters more than you think. That microwave mounted over the stove? Might look sleek, but reaching over boiling pasta is a safety hazard. Always position appliances where they’ll actually be used.

Tech upgrades we love (that won’t require a teenager to operate):

  • Motion-sensor faucets: For when your hands are covered in pizza dough.
  • Under-cabinet lighting: Eliminates shadowy knife-work zones.
  • Smart fridges: Okay, maybe skip the Twitter-enabled one, but internal cameras? Game-changer for grocery lists.

When to Wave the White Flag & Call Pros

Look, we get it—DIY is tempting. But if you’re debating moving load-bearing walls or rewiring, abort the mission and call a pro. Why risk a “Pinterest fail” when you could have a kitchen that works?

This is where we (shamelessly) brag: D&D Home Remodeling isn’t just another San Jose general contractor. We’re workflow nerds who geek out over ergonomic cabinet heights and appliance sightlines. Whether you’re in Cupertino craving a full home remodel or just need a kitchen refresh in Fremont, we’ve got your back.

Not convinced? Ask yourself:

  • Do I dread cooking meals?
  • Is my kitchen “party mode” just… sad?
  • Am I Googling “best remodeling company near me” at 2 a.m.?

Yeah. Thought so.

FAQs: Your Kitchen Workflow Queries, Sliced & Diced

1. Can I optimize my kitchen without a full remodel?
Absolutely! Start with zone-based organization (group tools by task) and affordable tweaks like pull-out shelves. But if your sink faces a wall while your stove is in Narnia, a reno might be overdue.

2. What’s the average cost for a kitchen workflow redesign?
Prices vary wildly—from $5k for minor tweaks to $50k+ for high-end full remodels. Pro tip: Get 3 quotes. We offer free consultations in Santa Clara and Milpitas because transparency matters.

3. How long does a kitchen remodel take?
4–12 weeks, depending on scope. We plan phases so your kitchen isn’t a construction site for months. Need it abortable? We build in flexible checkpoints.

4. Should I prioritize workflow over aesthetics?
Porque no los dos? A beautiful kitchen that frustrates you is like a sports car with no engine. We blend both—because you deserve pretty and practical.

Wrapping It Up: Your Turn to Stop the Chaos

Optimizing your kitchen workflow isn’t about luxury; it’s about reclaiming your time (and maybe your love for cooking). Whether you’re in Morgan Hill eyeing home additions or just need a layout tune-up in Sunnyvale, start with a plan. Sketch zones, measure your triangle, and ditch that “junk drawer of doom.”

Still overwhelmed? We’re here for you. At D&D Home Remodeling, we turn kitchen chaos into culinary harmony. Contact us today—because your dream kitchen shouldn’t stay in your dreams.

D&D Home Remodeling: Serving San Jose and the entire South Bay since 2007. Let’s make your kitchen the MVP of your home. 🙂

Front Porch Facelifts: Your Secret Weapon for Neighborhood Stardom

Hey neighbors! Ever stroll down your block and feel like your porch is… well, the awkward cousin at a family reunion? You’re not alone. We’ve all seen those porches—you know, the ones with the sagging swing, chipped paint, and a welcome mat that says “go away” without uttering a word. But here’s the fun part: transforming that tired space into a showstopper doesn’t require magic. Just a little know-how, some elbow grease (or a pro’s touch), and bam—you’re the block’s new MVP. At D&D Home Remodeling in San Jose, we eat, sleep, and breathe this stuff. Seriously, we’ve turned more “meh” porches into neighborhood magnets than we can count.

Front Porch Makeovers For Neighborhood Charm

Why Your Porch Isn’t Just a Place for Amazon Boxes

It’s the Handshake of Your Home
Think about it: your porch is the first thing folks see. It sets the vibe before anyone steps inside. A drab porch? It whispers, “We’re too busy binge-watching to care.” But a charming one? It screams, “Come on over for lemonade!” We’ve noticed homes with inviting porches actually boost curb appeal for the whole street. Yeah, you’re basically doing civic duty here.

The Subtle Art of Not Looking Like a Haunted House
Let’s be real—peeling paint and wobbly railings aren’t giving “cozy.” They’re giving “abandoned dollhouse.” A few smart tweaks, though, and you avoid becoming the neighborhood cautionary tale. Pro tip: if your porch looks like it’s auditioning for a horror flick, it’s time for an intervention.

Quick Wins: Because Patience Isn’t Always a Virtue

Spruce-Ups That Take a Weekend (or Less!)
Not every fix needs a general contractor or a second mortgage. Try these wallet-friendly tricks:

  • Paint Therapy: A fresh coat on the door, trim, or floor. Go bold—navy, crimson, or even teal. It’s like lipstick for your house.
  • Plant Power: Potted ferns, flowering annuals, or a tiny herb garden. Instant life, zero commitment.
  • Lighting Magic: Swap that flickering bulb for a pendant light or solar lanterns. Mood lighting > interrogation vibes.

When to Call the Cavalry
Okay, maybe you found rotten wood under that pretty paint. Or your steps slope like a skateboard ramp. No shame! That’s when exterior remodeling pros (like us, ahem) save the day. FYI, ignoring structural issues is like using duct tape on a leaky boat—it won’t end well.

Going Big: Porch Glow-Ups That Wow

Adding Square Feet Without Losing Your Sanity
Dreaming of a wraparound porch? Or maybe just extending the stoop? Home additions like these aren’t just pretty—they add real value. We recently expanded a cramped porch in Campbell into a full lounge zone (fire pit included!). Now the owners host trivia nights that block traffic.

Material Matters: Pick Like a Pro
|| Budget-Friendly | Mid-Range | Splurge-Worthy |
||——————|————-|—————–|
| Flooring | Stained concrete | Composite decking | Ipe hardwood |
| Railings | PVC | Wrought iron | Custom metalwork |
| Roofing | Basic awning | Beadboard ceiling | Cedar beams |
Table: Cost vs. impact for common upgrades. (Hint: composites last longer than wood and won’t warp in Sunnyvale’s sun!)

Why We’re Nerds About “Flow”
A porch should connect to your yard or garden. We added built-in benches and planters to a Los Gatos home, blending it with the landscape. Now it feels like an extension of the living room—not a waiting area for UPS.

Budget Talk: No, You Don’t Need a Money Tree

What’s This Gonna Cost Me?
We get it—price anxiety is real. Small refreshes? Maybe $500–$2K. Full overhauls (new roof, flooring, railings)? $10K–$25K. But here’s the kicker: exterior remodeling offers killer ROI. One Saratoga client recouped 80% of their investment at resale. Not too shabby!

The “Abortable” Plan (a.k.a. Smart Spending)
Start phased. Maybe do railings this year, flooring next. This way, you’re not locked into a full home remodel budget overnight. We design abortable stages so you can pause if life throws curveballs. Because sometimes, your kid’s braces do trump porch perfection.

Why DIY Sometimes Stands for “Destroy It Yourself”

Confessions of a Pro
We once fixed a porch where the owner tried to DIY concrete stairs. Let’s just say… they resembled modern art. Save yourself the headache: if it involves permits, load-bearing walls, or anything sharper than a paintbrush, call a renovation contractor. IMO, it’s cheaper than fixing botched work later.

Picking Your Dream Team
Look for:

  • General remodeling experts (porches aren’t the same as bathroom remodeler territory).
  • Local know-how (porches in Fremont face different weather than Morgan Hill!).
  • Photos of actual work. If their portfolio looks like a dark alley, hard pass.

Shameless plug: D&D Home Remodeling serves San Jose, Santa Clara, Cupertino, and beyond. Why us? We’ve nailed 200+ porch projects because we listen. No cookie-cutter nonsense. Just ask our Milpitas clients—their Spanish Revival porch now has neighbors taking selfies on it.

Ready to Be the Envy of Elm Street?

So—what’s your porch’s destiny? A cozy nook for morning coffee? A party central for the block? Whatever it is, start small or go big. Just start. Sketch ideas, binge Pinterest (we won’t judge), or just stare at your space until inspiration strikes.

And hey, if you’re in the South Bay and want a pro’s eye, D&D Home Remodeling offers free consultations. We’ll help you dodge pitfalls and max out charm. Because life’s too short for a boring porch. Let’s make yours legendary. 🙂

Got Questions? We’ve Got Answers:

  1. Q: How long does a typical porch makeover take?
    A: Quick refreshes: 1–3 days. Major rebuilds: 2–4 weeks. We keep timelines tight—nobody likes a construction zone for months.
  2. Q: Will I need permits?
    A: Often, yes—especially for structural changes, roofs, or railings. But relax; we handle all paperwork in San Jose and nearby cities. It’s included in our process.
  3. Q: What’s the biggest mistake homeowners make?
    A: Cheap materials. That bargain flooring might warp in Sunnyvale’s heat. Invest wisely—it pays off.
  4. Q: Can you match my porch to my home’s style?
    A: Absolutely! We geek out on architectural harmony. Craftsman? Colonial? Mid-century? Done. Your porch shouldn’t look like it time-traveled from 1987.

Ready to transform? Contact D&D Home Remodeling—the best remodeling company for porch magic near me (yes, we cover Campbell to Gilroy!). Let’s turn that “blah” into “bravo.”

Mirror Placement Tricks for Small Rooms: Your Cheat Code to Spacious Feels

Okay, let’s talk real talk. Ever walked into a tiny room and felt like the walls were closing in? Yeah, we’ve been there too. As the crew at D&D Home Remodeling in San Jose, we’ve seen more cramped spaces than a clown car convention. But here’s the secret weapon we swear by: mirrors. They’re like magic fairy dust for small rooms—minus the glitter cleanup. And trust us, a little strategic mirror wizardry beats knocking down walls (and your savings account) any day. So, grab a coffee, and let’s spill the beans on making your pint-sized space feel palatial.

Mirror Placement Tricks For Small Rooms

Why Mirrors Are Basically Space Wizards

We’ll cut to the chase: mirrors don’t add square footage, but they’re masters of illusion. They bounce light, double views, and trick your brain into thinking, “Hey, this room goes on forever!” Ever notice how fancy restaurants use ’em to feel luxe and airy? Same principle. In our general remodeling projects across San Jose, Sunnyvale, or Cupertino, we’ve seen a well-placed mirror transform a claustrophobic closet… err, room… into a serene oasis. It’s science, people—with a dash of voodoo.

Mirror Placement: The Golden Rules (No Dungeon Masters Required)

Forget random hanging. Placement is EVERYTHING. Get it wrong, and you’ll just double your pile of laundry. Get it right? Instant ooh-la-la.

Do This, Not That: Your Mirror Cheat Sheet

  • Opposite Windows = MVP Move: Hang a mirror directly across from a window. Natural light floods in, bounces off, and bam—your room just got a vitamin D glow-up.
  • Reflect Something Pretty: Aim mirrors at your favorite art, plants, or a tidy bookshelf. Pro tip: Never let it catch your overflowing junk drawer. We’ve seen it… it’s not chic.
  • Go Big or Go Home (Literally): One large mirror > ten tiny ones. It creates a seamless, expansive feel. Tiny shards? That’s just chaos in frame form.

Common Blunders Even Smart People Make

  • The “Clutter Multiplier”: Placing a mirror where it reflects your kid’s toy avalanche or your “I’ll fold it later” laundry mountain. Spoiler: It looks twice as messy.
  • Face-Level Fails: Hanging a mirror so you only see your forehead or knees. C’mon, we’re not decorating for giraffes.
  • Dark Corner Dumps: Tucking a mirror in a shadowy nook. Without light, it’s just a sad, black rectangle.

Next-Level Tricks You’re Not Trying (But Should!)

Ready to graduate from Mirror Placement 101? Let’s get sneaky.

Mirrored Furniture: A dresser or coffee table with mirrored fronts? It adds depth without screaming “I’m trying too hard!”
Ceiling Magic: Tilted mirrors on a tray ceiling? Mind. Blown. It’s like sky-lite for windowless rooms.
Backsplash Brilliance: In a tiny kitchen or bath, a mirrored backsplash feels luxe and airy. Just don’t blame us if you get distracted by your own dazzling reflection.

Mirror Type Comparison: Pick Your Illusion

Mirror Type Best For Space-Expanding Power Cost Factor
Floor-Length Narrow hallways, bedrooms ★★★★★ (Creates “infinite” feel) $$$ (Custom cuts add up)
Decorative Framed Living rooms, above mantles ★★★☆☆ (Style + function) $$ (Frames hike the price)
Mirrored Tiles Backsplashes, accent walls ★★★★☆ (Flexible & modern) $ (Budget-friendly!)
Furniture-Integrated Small studios, dressing areas ★★★☆☆ (Subtle & practical) $$$ (But worth it IMO)

FYI, if you’re DIY-phobic, our team at D&D Home Remodeling hangs these daily—no wonky installations or existential crises. 🙂

When to Call Reinforcements (Like… Us!)

Look, we love a good DIY spirit. But when you’re dealing with heavy, oversized mirrors, custom shapes, or tricky plaster walls? One wrong move and it’s game over. That’s where a pro general contractor (hi there!) saves your sanity—and your security deposit.

Why we’re your mirror wingmen:

  • No “Abortable” Projects: We plan meticulously so you’re not stuck mid-renovation with a half-hung mirror and regret.
  • Safety First: Heavy glass + gravity = bad day. We secure it properly.
  • Beyond Mirrors: Need a bathroom remodeler to create space before mirroring it? Or exterior remodeling to add light? We handle full home remodels too.

Whether you’re in San Jose, Santa Clara, Campbell, or Fremont, D&D Home Remodeling is the best remodeling company for seamless results. Seriously, why stress when you can text us?

“But What About Cost?!” – Let’s Demystify

Mirror prices can range from “thrift store steal” to “custom-artisan-heirloom.” Here’s the real deal:

  • Basic mirrors: Cheap! But you get what you pay for (warping, thin glass).
  • Custom sizes/shapes: Higher price, but essential for awkward walls.
  • Professional install: Worth every penny for large pieces.

Think of it as an investment. A $200 mirror that makes your $300k San Jose condo feel bigger? That’s ROI, baby. And hey, we offer free estimates—no murky “cost near me” guesswork.

FAQs: Your Burning Mirror Questions, Answered

1. Can mirrors make a dark room brighter?
Absolutely! Place them opposite light sources (windows, lamps). They amplify existing light like a disco ball—minus the 70s vibe.

2. Are mirrored walls still cool?
IMO, strategic mirrored accents (like a panel behind shelves) are chic. Floor-to-ceiling 1980s gym vibes? Hard pass.

3. What’s the best mirror for a tiny bathroom?
Go vertical! A tall mirror above the vanity elongates the room. Pair it with sleek lighting—our bathroom remodeler team in Milpitas or Saratoga does this daily.

4. Can I use mirrors in exterior spaces?
Carefully! A mirrored accent wall on a covered patio can expand outdoor vibes. But avoid direct sun spots—glare city. Our exterior remodeling gurus in Los Gatos or Morgan Hill can advise.

Wrapping Up: Your Small Room’s New Best Friend

So there you have it—mirrors aren’t just for checking your hair. Used right, they’re the ultimate hack for cramped spaces. Start small (pun intended), experiment, and remember: if it feels overwhelming, D&D Home Remodeling is just a call away. Serving San Jose to Sunnyvale, we turn “cozy” into “cavernous” without lifting a sledgehammer. Ready to see your space in a whole new light? Let’s chat. 😉

Feeling inspired? Text D&D Home Remodeling at [Your Phone] or visit [Your Website] for a free consultation. Because life’s too short for tiny-room claustrophobia.

Roofing Company - New Roof

Double the Panes, Half the Headaches: Why We’re Obsessed with Dual-Pane Windows

Hey there, fellow home enthusiasts! Ever sat near a window in winter and felt that icy draft sneak in like an uninvited guest? Or tried to enjoy a quiet Sunday only to be serenaded by every passing car, barking dog, and leaf blower symphony? Yeah, we feel you. It’s enough to make you want to… well, not remodel anything ever again. But hold up! Before you throw in the towel (or the window sash), let’s chat about dual-pane windows. Spoiler: They’re a total game-changer, and we’ve seen the magic firsthand at D&D Home Remodeling in San Jose.

Dual-Pane Window Advantages

What’s the Big Deal with Two Panes Anyway?

Okay, let’s break it down without the engineering jargon. Dual-pane windows are basically sandwiches: two sheets of glass with a cozy gap of air or gas (like argon) in between. Simple, right? But this tiny pocket of nothing? It’s a superhero.

Why we’re all-in on dual-pane magic:

  • Energy Savings That’ll Make Your Wallet Happy: Single-pane windows are like leaving your front door wide open in January. Dual-pane? They’re the snug blanket your HVAC system craves. You’ll slash heating and cooling bills by up to 30%. Cha-ching!
  • Noise Reduction for Your Sanity: Living near a busy street in Campbell or Sunnyvale? Dual-pane windows can cut outside noise by 50% or more. Suddenly, that neighbor’s obsession with power tools becomes background ambiance.
  • Bye-Bye, Condensation Drama: Ever seen frost inside your window? Single panes love to sweat and freeze. Dual panes keep the inner glass warmer, so you skip the indoor ice rink.
  • UV Protection That Doesn’t Quit: Harmful UV rays fade furniture and floors. Dual-pane windows often come with low-E coatings that block 99% of UV damage while letting in gorgeous natural light.

Personal rant time: We’ve replaced hundreds of single-pane windows in historic Saratoga homes. The owners always ask, “Why didn’t we do this sooner?” IMO, it’s the best bang-for-your-buck upgrade in home remodeling services.

The Sneaky Perks You Didn’t See Coming

Beyond the obvious wins, dual-pane windows pull some serious hidden tricks:

  • Security Boost: Two panes = twice the barrier against break-ins. Add laminated glass? Now we’re talking Fort Knox vibes.
  • Increased Home Value: Appraisers love energy-efficient upgrades. Installing dual-pane windows can spike your resale value. Take that, flimsy 1970s originals!
  • Eco-Warrior Status: Using less energy isn’t just good for your bills—it’s a high-five to the planet.

Dual-Pane vs. Single-Pane: The Showdown

Feature Single-Pane Windows Dual-Pane Windows Why It Matters?
Energy Efficiency Poor (R-value ~1) Excellent (R-value ~2-4) Lower bills, fewer drafts
Noise Reduction Minimal Significant (STC 28-32) Peace in noisy urban spots
Condensation Risk High (especially in winter) Low to None No mold, no icy interiors
Upfront Cost $100-$300 per window $350-$800 per window Long-term savings > initial price
Lifespan 10-20 years 20-30+ years Fewer replacements = less hassle

FYI: That “cost” difference stings upfront, but it’s like buying premium coffee beans instead of instant—you savor the ROI for decades.

Let’s Talk Numbers: The “Cost” Elephant in the Room

“Okay, smartypants,” you say, “What’s the actual price?” Fair question! A full home remodel with dual-pane windows runs $8,000–$25,000+ depending on size, materials, and whether you’re in a $$$ zip code like Los Gatos or Cupertino.

What drives the price?

  • Frame Material: Vinyl (budget-friendly), wood (classy but pricier), fiberglass (durable diva).
  • Gas Fill: Argon = standard. Krypton = premium (for thinner profiles).
  • Installation Complexity: Historic homes in Saratoga? That’s a artisan-level puzzle.

Pro Tip: Worried about commitment? Some contractors (ahem, like us at D&D Home Remodeling) offer abortable phased projects. Start with just the west-facing windows in Sunnyvale—where the sun blasts hardest—and expand later.

When Dual-Pane Windows Become Non-Negotiable

Not sure if you need them? If any of these sound familiar, stop hesitating:

  • Your energy bills resemble a mortgage payment.
  • You’ve memorized every lyric to the “Fremont 680 Traffic Jam” soundtrack.
  • Your windows rattle when a squirrel walks by.

True story: We helped a client in Morgan Hill whose single-pane windows were so drafty, her cat refused to sit on the sill. Post-upgrade? Cat paradise. Priorities, people!

Why Installation Isn’t a DIY Project (Seriously, Don’t Try This)

Look, we get it—YouTube makes everything look easy. But botching window installs leads to leaks, voids warranties, and turns your “cost” savings into a money pit.

Why hire a pro?

  • Precision Matters: A 1/8″ gap can sabotage insulation.
  • Weatherproofing Wizardry: Flashing, sealing, and insulation require expertise.
  • Time = Money: Pros like our crew at D&D Home Remodeling knock out installations in days, not weekends.

Whether you’re eyeing exterior remodeling or a full home remodel, always use a licensed general contractor. And if you’re Googling “best remodeling company near me” in Santa Clara or Milpitas? cough We’re just a call away.

The Downsides? Yeah, We’ll Be Honest

Dual-pane windows aren’t perfect. Sometimes, the seal fails (rare with quality brands), causing fog between panes. Repairs can be tricky—often requiring full replacement. And yeah, the upfront “price” hurts more than stepping on a Lego. But compared to the agony of drafts, noise, and sky-high bills? Totally worth it.

Wrapping Up: Your Home’s Silent Superhero

Let’s be real: Windows aren’t sexy. They don’t have the glam of a kitchen reno or the thrill of home additions. But dual-pane windows? They’re the unsung heroes of comfort, savings, and sanity.

At D&D Home Remodeling, we’ve transformed homes from Palo Alto to Morgan Hill with these gems. Whether you need a bathroom remodeler who gets your vision or a house remodeling contractor for a full overhaul, we’ve got your back.

Ready to ditch the drafts and noise pollution? Contact us for a consultation. Let’s make your home quieter, cheaper to run, and downright cozy. Because life’s too short for chilly toes and noisy neighbors 🙂


FAQs: Dual-Pane Windows Unfiltered

1. How long do dual-pane windows last?
Typically 20–30 years. Quality seals and frames (like vinyl or fiberglass) push longevity higher. Pro tip: Opt for warranties of 10+ years.

2. Can I replace just one window, or do I need a full set?
You can replace singles, but consistency boosts energy efficiency and aesthetics. We often recommend starting with the most problematic areas (e.g., west-facing rooms).

3. Are dual-pane windows worth it in mild climates like Campbell?
Absolutely! Even in temperate zones, they block noise, reduce UV damage, and prevent condensation. Plus, California energy codes now favor dual-pane in new builds.

4. What’s the #1 mistake homeowners make when buying dual-pane windows?
Focusing solely on price. Cheap windows fail faster and save less energy. Invest in quality glass, gas fills, and professional installation—it pays off.


D&D Home Remodeling is your San Jose-based partner for everything from quick window swaps to full home remodels. Serving Santa Clara, Fremont, Milpitas, and beyond. Let’s build something awesome together!

construction company - home addition

Bay Area Treasure Hunting: Your Guide to Salvaged Material Sourcing (Without the Headaches!)

Alright, fellow Bay Area renovators and design dreamers! Let’s talk about something that gets our hearts racing almost as much as finding a parking spot in North Beach on a Saturday: salvaged material sourcing. You know, that gorgeous old-growth redwood beam, those perfectly imperfect vintage tiles, the solid brass hardware whispering tales of another era. It’s not just about saving money (though that’s a sweet perk), it’s about injecting soul, history, and serious eco-cred into your home. And honestly, who doesn’t love a good treasure hunt? Especially when the treasure makes your kitchen backsplash the envy of the neighborhood?

Salvaged Material Sourcing In The Bay Area
Home Addition

We get it. The idea of sourcing salvaged materials can feel overwhelming. Where do you even start? How do you know it’s not junk? Will it actually fit? That’s where we come in. As D&D Home Remodeling, your friendly neighborhood general contractor based right here in San Jose, we’ve navigated more salvage yards and deconstruction sites than we can count. We’ve seen the diamonds in the rough and, let’s be real, we’ve also seen the rough that’s just… rough. We live for this stuff, and we want to make your salvaged dreams a reality without the nightmare scenarios. Think of us as your salvage-savvy partners in crime for your next bathroom remodeler quest, full home remodel, or even those cool home additions you’re sketching out.

Why Salvaged Stuff Rocks Our World (And Should Rock Yours Too!)

Let’s cut to the chase: why bother with salvaged when big box stores are so… convenient? Well, IMO, it boils down to three big wins:

  1. Planet Power: Landfills are overflowing, folks. Choosing salvaged materials means giving perfectly good stuff a second life. It drastically cuts down on the energy and resources needed to make new products. Basically, you’re a recycling superhero without the cape (unless you’re into that, no judgment).
  2. Character You Can’t Buy: That slight patina on reclaimed brick? The unique grain in an old barn door? Mass-produced stuff just can’t replicate the history and charm. Salvaged materials add instant depth and a story to your space. It’s like your house gets its own unique fingerprint.
  3. Wallet Whisperer (Sometimes!): Okay, this one needs nuance. Sometimes, that rare antique heart pine floor will cost more than new. But, often, you can find incredible deals, especially on items like solid wood doors, vintage fixtures, bricks, or beams. Plus, you’re potentially saving on disposal costs for demolition materials if you’re doing a renovation contractor gig. The “cost” equation isn’t just the sticker price; it’s value and impact.

Where to Hunt for Bay Area Salvage Gold

The Bay Area is a fantastic place for salvage sleuthing. Forget just searching “salvage near me” and hoping for the best. Here’s the lowdown on our go-to spots:

  • Dedicated Salvage Yards: These are the treasure troves! Places like Ohmega Salvage (Berkeley/Burlingame), The ReUse People (multiple locations, including Oakland), and Building Resources (SF) are packed with doors, windows, lumber, fixtures, hardware, and architectural elements. Wandering these aisles is pure inspiration. Pro tip: Go with measurements and an open mind!
  • Online Marketplaces: Craigslist, Facebook Marketplace, and specialty sites like Kaiyo or even Etsy can yield gems. You might find someone just down the street in Sunnyvale or Campbell demoing their old kitchen and giving away solid maple cabinets. Be quick, be safe (meet in public!), and inspect carefully. FYI, photos can be deceiving!
  • Deconstruction & Demolition Companies: More folks are opting for deconstruction (carefully taking a building apart to save materials) instead of smash-and-trash demolition. Companies like The ReUse People or Habitat for Humanity ReStores often source directly from these projects. It’s a win-win: less landfill, more good stuff available.
  • Architectural Antique Shops: For those truly special, high-end finds (think stained glass, ornate mantels, vintage lighting), shops scattered around Saratoga, Los Gatos, and San Francisco are worth the splurge. Perfect for that statement piece.

Navigating the Salvage Maze Like a Pro (Or Just Call Us!)

Okay, enthusiasm is great, but let’s get practical. Sourcing salvaged materials isn’t always plug-and-play. Here’s what we’ve learned the hard way, so you don’t have to:

  • Inspect Like a Hawk: That beautiful clawfoot tub might have hidden cracks. Termites love old wood. Check for rot, structural integrity, lead paint (common pre-1978), and asbestos (especially in old flooring/mastics). Don’t be shy – get hands-on! A project shouldn’t become abortable because of hidden damage.
  • Measure Twice (Thrice!), Buy Once: Salvage isn’t like ordering custom. That vintage door is the size it is. Ensure it actually fits the rough opening in your exterior remodeling project. Bring detailed measurements and pictures of the space it needs to go into. Seriously, measure everything!
  • Embrace the Imperfect: Salvaged often means unique variations, patina, and minor flaws. That’s the charm! If you demand factory-perfect uniformity, salvage might drive you bonkers. Decide what imperfections you can live with (or even love).
  • Plan for Prep & Adaptation: Cleaning, stripping, repairing, refinishing – salvaged materials usually need TLC. Factor this into your timeline and budget. Your house remodeling contractor needs to know how to work with it properly. Will that old beam need structural reinforcement? Will those tiles need special cutting?

Why Your Contractor Matters (Hint: We’re Kinda Awesome at This)

Look, we love a DIY spirit. But integrating salvaged materials smoothly into a major project like a full home remodel or complex bathroom remodeler job? That’s where experience is non-negotiable. Here’s why partnering with a general remodeling pro like D&D Home Remodeling makes all the difference:

  • We Know the Sources: We’ve built relationships with salvage yards and deconstruction crews across Santa Clara County, from Milpitas to Morgan Hill. We often get heads-ups on incoming materials perfect for your project in Cupertino or Fremont.
  • We Speak “Salvage”: We understand the structural implications, the quirks of old plumbing/electrical fixtures, and the best methods for restoring and installing vintage elements. No nasty surprises halfway through.
  • Logistics & Problem Solvers: Hauling a massive antique door? Storing materials securely? Figuring out how to make mismatched vintage tiles look intentionally fabulous? We handle the heavy lifting (literally and figuratively) and creative solutions.
  • Seamless Integration: We ensure the salvaged pieces work with the new construction and modern systems, creating a cohesive, functional, and stunning final result. Your vision, executed flawlessly.

Wondering if we’re the best remodeling company for your salvaged vision? Give us a shout! Let’s chat about your home remodeling services needs in San Jose or anywhere in the South Bay. We geek out over this stuff.

The Real Talk on Salvage Costs

Let’s demystify the “cost” factor. Salvage pricing is its own wild beast. Here’s a quick breakdown of what influences the price:

Factor Impact on Cost Pro Tip
Rarity & Demand High (e.g., old-growth redwood, intricate stained glass) = $$$$ Be flexible! A less trendy wood species might offer similar character for less.
Condition Ready-to-install = Premium. Needs major repair = Potential bargain (but factor repair costs!). Honestly assess your budget and tolerance for restoration work.
Quantity Needed Finding enough matching items (like tiles) can be hard & costly. Consider using salvaged as an accent if matching a large area is tricky/expensive.
Location & Source Architectural antique shops > Salvage yards > Online/Free listings Check multiple sources! That perfect sink might be cheaper two towns over in Campbell.
Labor & Prep Cleaning, repairing, adapting salvaged materials often adds to labor costs. Factor this in upfront! A good general contractor will provide realistic estimates.

Sometimes salvage is a steal. Sometimes, it’s an investment in a unique, sustainable piece. The key is going in with eyes wide open and a realistic budget. We always work with our clients to source options that match their vision and their wallet.

Salvage Sourcing FAQs (We Get These All the Time!)

  1. “Is using salvaged materials actually cheaper?”

    It can be, but not always. You might save on the material cost itself, especially compared to high-end new equivalents, but remember to factor in potential restoration, specialized labor, and the time spent sourcing. Sometimes the savings are in the unique value and environmental benefit, not just the initial price tag. We help you weigh the true total cost.

  2. “How do I know if salvaged wood or something is structurally sound?”

    This is CRUCIAL. Look for major cracks, rot, insect damage (poke it with a screwdriver – soft spots are bad news). Check for excessive warping or twisting. If it’s for a critical structural element (like a beam), always have it assessed by a structural engineer or an experienced general contractor like us. Don’t gamble on safety.

  3. “What about lead paint or asbestos in old salvage?”

    Very real concerns, especially in pre-1978 materials. Assume paint contains lead unless proven otherwise. Asbestos can be in old flooring, adhesives, pipe insulation, and even some tiles. If you’re unsure, get it tested by a certified professional before bringing it home or disturbing it. Safety first, folks. We handle this properly on our job sites.

  4. “Can I use salvaged materials for plumbing or electrical fixtures?”

    Tread carefully! While vintage faucets, lights, and switches are gorgeous, they may not meet current codes or safety standards. Old plumbing fixtures might have lead components. Wiring in old lights can be degraded or unsafe. Often, the best approach is to use the salvaged fixture aesthetically but rewire it or replumb it internally with modern, safe components by a licensed pro. We specialize in making vintage look gorgeous and function safely.

Ready to Unleash Your Inner Salvage Sleuth (With Backup)?

So, there you have it – our take on the wild, wonderful world of salvaged material sourcing in the Bay Area. It’s an adventure, a sustainability win, and a way to create a home that’s truly one-of-a-kind. Yes, it takes a bit more effort and a keen eye, but the payoff in character and conscience is unbeatable.

Feeling inspired but maybe a tad intimidated? That’s totally normal! This is exactly where D&D Home Remodeling shines. Whether you’re dreaming of a bathroom featuring vintage tiles, a kitchen with reclaimed beams, or exterior remodeling with character-rich old bricks, we have the passion, the expertise, and the network to make it happen smoothly. We handle the complexities of integrating salvaged treasures into your home additions or general remodeling project across San Jose, Santa Clara, Campbell, Milpitas, Saratoga, Sunnyvale, Los Gatos, Cupertino, Fremont, and Morgan Hill.

Don’t let your salvaged dreams stay dreams. Let’s go treasure hunting together and build something incredible (and uniquely yours). Give D&D Home Remodeling a call today – your historic, eco-friendly masterpiece awaits! 🙂

construction company - full house remodeling

Unlocking Your Backyard Goldmine: Santa Clara County’s Granny Flat Rules Demystified

Hey there, fellow property enthusiasts! Ever looked at that underused patch of yard behind your house and thought, “There’s gotta be a better use for this than storing rusty lawn furniture”? What if we told you it could become a rental income stream, a cozy artist studio, or the perfect haven for your mother-in-law (yes, really!)? Welcome to the world of granny flats – Santa Clara County’s hottest real estate hack. But before you grab a sledgehammer, let’s chat about the rules. Trust us, navigating regulations here can feel like decoding ancient scrolls. Lucky for you, we’ve been wrestling with permits in San Jose and beyond for years at D&D Home Remodeling.

Granny Flat Regulations In Santa Clara County
Full House

Why Granny Flats Are Silicon Valley’s Secret Sauce

Let’s be real: housing here costs more than a kidney. Granny flats (officially “accessory dwelling units” or ADUs) let you legally add housing without selling your firstborn. Think:

  • Rental income to offset that brutal mortgage.
  • Space for aging parents (without sharing your Netflix password 24/7).
  • A home office that isn’t your closet.
    Heck, we’ve seen clients in Campbell and Cupertino cover 80% of their mortgage by renting theirs out. Cha-ching!

Cracking Santa Clara County’s ADU Code: No Law Degree Required

Alright, let’s cut through the jargon. The county relaxed rules in 2020, but surprises still lurk. Here’s the cheat sheet:

Size & Placement: How Big, Where, and “Nope, Not There”

  • Max Size: 1,200 sq ft for detached units. Attached? Up to 50% of your main house size.
  • Setbacks: Just 4 feet from side/rear property lines. No more begging neighbors for permission!
  • Height Limits: 16-18 ft max, depending on roof style. Sorry, no castle turrets.

Parking: The Eternal Battle

Good news! If you’re within ½ mile of transit (hello, Milpitas light rail!), parking requirements vanish. Otherwise, just one space. Pro tip: Tandem spots count.

Utility Hookups: Sewers vs. Septic Tanks

Most Santa Clara urban areas mandate sewer connections. Rural spots like Morgan Hill? Septic systems are fine, but expect extra inspections. FYI, this is where costs can spike.

Owner-Occupancy: The “Gotcha” Clause

Santa Clara County doesn’t require you to live on-site. Rent both units if you want! (Insert evil landlord laugh here).

Santa Clara County Granny Flat Rules At-a-Glance
| Requirement | Standard Rules | Exemptions/Loopholes |
|————————|—————————————————|—————————————|
| Max Size | 1,200 sq ft (detached) | Up to 50% main home size (attached) |
| Setbacks | 4 ft from rear/side lot lines | Zero ft for existing garages! |
| Parking Spaces | 1 space per unit | Waived near transit (½ mile) |
| Height Limit | 16 ft (flat roof), 18 ft (pitched) | None – this one’s strict |
| Owner Occupancy | NOT required | Rent both units freely! |

The Build Process: From “Cool Idea” to Keys Handed Over

Phase 1: Design & Dreams
Sketch your vision. Want a full kitchen? Legal! Bathroom? Essential. Pro tip: Work with a general contractor who knows ADU quirks – like how window placements affect cost.

Phase 2: Permit-Palooza
Submit plans to Santa Clara County Planning & Development. Timeline: 60 days. Reality? Delays happen. We once saw a Sunnyvale client’s permit stalled over a tree root report. Eye roll.

Phase 3: Construction Chaos
Foundations, framing, sparkies – the fun stuff. Budget 6-12 months. D&D Home Remodeling handles this daily, so we’ve streamlined it. No rookie mistakes like placing the toilet where the stove should go 🙂

Oops-Proofing Your Project: Dodge These Disasters

  • “Why’s My Budget Bleeding?”
    Hidden costs bite: soil tests, utility hookups, impact fees. Expect $150k-$400k. Get granular quotes – ask about price breakdowns for labor vs. materials.
  • Design Regrets
    That Pinterest-perfect loft? Might violate fire codes. Hire a renovation contractor for feasibility checks before falling in love.
  • Permit Nightmares
    Non-compliant stairs? Incorrect insulation? County inspectors will find it. Make plans abortable early if red flags pop up.

Why Go Pro? (Or: How Not to Become a DIY Meme)

Look, we adore ambition. But granny flats blend exterior remodeling, zoning law, and engineering. One D&D Home Remodeling client in Saratoga tried DIY and accidentally built 3 feet over his setback. Cue $20k in rework. Ouch.

As the best remodeling company in the South Bay, we:

  • Navigate permits while you sip coffee.
  • Optimize layouts to maximize sq ft.
  • Fix “helpful” suggestions from Uncle Bob (“What if we skip the foundation?”).

Seriously, why stress? Contact us for a no-pressure chat. We’ve crafted ADUs from Los Gatos to Fremont and know every county loophole.

Granny Flat FAQs: Your Burning Questions, Answered

1. Can I build an ADU on a small lot?
Absolutely! Santa Clara County allows ADUs on any residential lot, regardless of size – as long as you meet setback and height rules. Even tiny San Jose lots qualify.

2. How much does a granny flat REALLY cost?
Budget $250k-$400k for turnkey projects. Factors: size, materials (luxe finishes add up), and site prep. Detached units cost more than garage conversions.

3. Can I use my ADU as a short-term rental (Airbnb)?
Nope! County rules require leases of 30+ days. Save the Airbnb dreams for Tahoe.

4. Do I need separate utilities?
Not necessarily. You can share meters with the main house, but tenants often prefer separate billing. We handle this during design.

Ready to Turn Your Yard Into an Asset?

Granny flats aren’t just sheds with Wi-Fi – they’re smart investments in Santa Clara’s crazy market. Whether you’re in Campbell or Morgan Hill, the rules are navigable… with backup. At D&D Home Remodeling, we eat permit paperwork for breakfast and laugh in the face of zoning hiccups.

Don’t just Google “home remodeling services near me” and hope for the best. Partner with a house remodeling contractor who’s built 50+ ADUs (that’s us!). Contact D&D Home Remodeling today for a free site assessment. Let’s make your backyard the envy of the block – legally! 😉

remodeling company - interior remodeling

Pool House Possibilities: Your Backyard’s Next Best Friend (Sorry, Fido)

Okay, let’s talk backyard bliss. Picture this: It’s a gorgeous San Jose afternoon, sun blazing (because, let’s be real, it often is), you’ve just finished some invigorating laps in the pool, and instead of dripping all the way through the house to change or hunt for a towel… you glide effortlessly into your own dedicated poolside sanctuary. Sounds pretty sweet, right? That’s the magic of a well-designed pool house. Forget just storing noodles and chlorine – we’re talking about unlocking serious potential right in your own backyard. At D&D Home Remodeling, we see these projects as game-changers, and honestly? We geek out over them. So, grab a cold drink (poolside, if you’re lucky!), and let’s dive into the awesome world of pool house construction.

Pool House Construction Possibilities

Why a Pool House? More Than Just a Fancy Shed

Seriously, why bother? It’s not just about keeping wet towels off your good sofa (though, let’s be honest, that’s a major win). Think of a pool house as your backyard’s command center and ultimate chill zone. Need a quick bathroom break without trekking through the house? Done. Want a shaded spot to refuel with snacks and drinks without constant kitchen raids? Absolutely. Hosting a summer bash? It becomes your guest haven, bar station, or even a spot for the kids to crash. Plus, home additions like this? They seriously boost your lifestyle and your property value. Win-win. We’ve helped folks in Saratoga turn a basic cabana into a mini-guest suite and transformed cramped setups in Sunnyvale into full-blown entertainment hubs. The possibilities? Pretty much endless, as long as your imagination (and maybe your lot size!) allows.

Dreaming Up Your Style: From Cozy Nooks to Mini-Mansions

What vibe are you feeling? Your pool house should feel like a natural extension of your home and your personality. Here’s a quick peek at popular styles we love crafting around San Jose and the South Bay:

  • The Classic Cabana: Simple, elegant, focused on shade and storage. Think open sides, maybe some breezy curtains, perfect for changing and stashing gear. Great for smaller yards in Campbell or Milpitas.
  • The Modern Oasis: Clean lines, sleek materials (think polished concrete, large glass sliders), maybe a green roof. Feels ultra-luxurious in Los Gatos or Cupertino backyards.
  • The Rustic Retreat: Warm wood, stone accents, a cozy fireplace for those cooler Morgan Hill evenings. Feels inviting and timeless.
  • The Entertainer’s Epicenter: This is where it gets fun. We’re talking full bathrooms (maybe even a shower!), a kitchenette, comfy seating, maybe even a TV or sound system. Perfect for the Sunnyvale or Fremont families who love hosting.

The key? Matching it to your home’s architecture and how you actually use your yard. Don’t build a palace if you just need a dry spot for towels! Pro Tip: Chatting with a seasoned renovation contractor like us early on helps nail the style that fits your life and your home perfectly.

Breaking Ground: What Actually Goes Into Building This Thing?

Alright, let’s get down to brass tacks. Building a pool house isn’t quite like assembling IKEA furniture (thank goodness). It involves several key steps, and having a solid general contractor coordinating it all is non-negotiable. Here’s the typical play-by-play:

  1. The Grand Plan: This is where dreams meet reality (and zoning codes!). We figure out size, placement (sun exposure, views, privacy, access from the pool and house), style, and features. Permits are coming. Brace yourselves. 🙂
  2. Foundation & Frame: Just like your main house, it needs solid bones. Slab, crawlspace, or piers – depends on the site and design. Then up goes the skeleton!
  3. Getting Wrapped Up: Roofing, siding (exterior remodeling skills come into play here!), windows, and doors get installed. This is where it starts looking like a real structure!
  4. The Guts: Electrical for lights and outlets, plumbing if you’re adding that sweet bathroom or wet bar (essential for true convenience!), insulation (yes, even here!), and HVAC if you want climate control (a lifesaver in our Santa Clara County extremes).
  5. Finishing Touches: Drywall, paint, flooring, cabinets, countertops, fixtures – this is where the personality shines! This is also where that bathroom remodeler expertise within our team becomes super valuable if you’re adding plumbing.

Material Matters: A Quick Comparison

Feature Wood (Cedar, Redwood) Metal (Steel) Prefabricated/Panelized
Cost Moderate to High Moderate Lower to Moderate
Durability High (with treatment) Very High Moderate to High
Aesthetics Warm, Natural, Custom Modern, Clean Limited Styles
Speed Slower (On-site) Moderate Fastest
Maintenance Higher (Staining/Sealing) Low Low to Moderate
Best For Custom looks, Rustic/Classic Modern styles, Durability Budget-conscious, Quick timelines

FYI: While prefab can be tempting for speed and price, custom builds (using wood or metal framing) give you unparalleled flexibility in design and features, especially for trickier lots in places like Saratoga or the hills of Los Gatos. It’s about finding the right balance for your project.

The Elephant in the Room: Let’s Talk Pool House Cost

Okay, deep breath. “What’s the cost?” It’s the question we hear most, and honestly? It’s like asking “How much does a car cost?” A basic changing shed is wildly different from a tricked-out guest suite with a full bath and kitchenette. Key factors:

  • Size: Square footage is a major driver. Bigger = more materials, labor, etc.
  • Complexity: Simple box vs. fancy rooflines, lots of windows, high-end finishes.
  • Amenities: Plumbing (bathroom remodeler territory!), electrical load, HVAC, kitchenette? Each adds layers of cost.
  • Materials: See that table above? Choices matter.
  • Site Work: Is your backyard level and easy to access? Or is it a steep slope in the Saratoga foothills needing extra grading and engineering? Big difference.

Ballpark? (And I mean very ballpark, IMO). A basic, small structure might start in the $20k-$40k range. A medium-sized pool house with some plumbing and nicer finishes? $50k-$100k+. A full-blown luxury retreat? Easily $150k+. Why the vagueness? Because every single project we do for clients in San Jose, Santa Clara, Campbell, or Cupertino is unique. The only way to get a real price is a detailed consultation. That’s why we offer free estimates – no mystery, just clarity. Transparency is kind of our thing.

Permits, Paperwork, and Patience (The Three P’s of Pain?)

Yep, you gotta deal with the city or county. Permits are non-negotiable. Trying to skip this step is playing with fire (and potentially very expensive fines or being forced to tear it down – yikes!). The process varies between San Jose, Sunnyvale, Milpitas, Fremont, etc., but generally involves submitting your plans, waiting for review, addressing any comments, getting inspections during construction, and finally, getting that sweet, sweet Certificate of Occupancy. Is it fun? Not usually. Is it necessary? Absolutely. A good house remodeling contractor (like, ahem, us at D&D Home Remodeling) handles this heavy lifting for you. We know the local codes inside and out across Santa Clara County – it’s part of our general remodeling superpower. Think of us as your permit sherpas.

Why Going Pro Isn’t Just Fancy Talk (It’s Smart)

Look, we get the DIY spirit. Building a birdhouse? Awesome. Building a structurally sound, plumbed, wired, permitted structure that needs to withstand our weather and last decades? That’s a whole different ballgame. Here’s why partnering with a general contractor like D&D Home Remodeling makes sense:

  • Complexity Conquerors: Coordinating foundations, framing, roofing, electrical, plumbing, HVAC, finishes… it’s a symphony. We conduct the orchestra.
  • Code Whisperers: We speak permit-ese fluently and navigate the bureaucracy so you don’t have to.
  • Vendor Vets: We have trusted relationships with the best subs (electricians, plumbers, etc.) – no scrambling to find someone “near me” who might flake.
  • Problem Solvers: Unexpected soil issues? Surprise utility line? We’ve seen it and fixed it. Keeps the project moving.
  • Warranty & Peace of Mind: If something isn’t right down the line, you have one team to call – us. No finger-pointing between trades.
  • Time (& Sanity) Savers: Seriously, do you have months to manage this alongside everything else? We do this every day.

We’ve seen too many ambitious DIY projects stall out or become money pits. Hiring the best remodeling company for the job means it gets done right, on budget (as much as possible!), and without you needing to become a construction manager overnight. Plus, for larger projects like a full home remodel that includes a pool house, having one team handle it all ensures seamless design and execution.

Oops! Common Pool House Pitfalls (And How We Dodge ‘Em)

Want to avoid facepalm moments? Steer clear of these common blunders:

  • Ignoring the Sun & Wind: Placing it where the afternoon sun bakes it like an oven or where prevailing winds turn it into a wind tunnel? Bad move. We analyze your site.
  • Skipping the Bathroom: Seriously, even a simple toilet and sink is a HUGE upgrade. Don’t regret skipping it.
  • Underestimating Storage: You need way more space for towels, floats, chemicals, and toys than you think. We plan it in.
  • Forgetting About Power: Need outlets for blenders, phone chargers, speakers? Plan the electrical early!
  • Cheaping Out on Materials: That bargain siding won’t look so good after one wet Morgan Hill winter. We guide you on smart investments.
  • Not Thinking Long-Term: How will you use it in 5 or 10 years? Build in some flexibility.

Working with experienced pros like us at D&D Home Remodeling helps you sidestep these headaches. We ask the right questions upfront.

Your Pool House Questions, Answered!

Let’s tackle some of the most common things folks ask us:

  1. “Do I really need permits for a pool house?”
    Yes. Absolutely. 100%. No wiggle room. Building departments in San Jose, Campbell, Los Gatos, and everywhere else require permits for permanent structures of this nature. Skipping them risks fines, forced removal, and problems selling your home later. We handle this essential step.
  2. “Can I add a pool house to my existing pool, or does it need to be built at the same time?”
    You can absolutely add one later! It’s a very common project for us. While coordinating with the original pool builder is ideal, a skilled renovation contractor can design and build a pool house that integrates beautifully with your existing setup. We just need clear access to the site and utilities.
  3. “How long does it typically take to build?”
    This varies hugely based on size, complexity, and the permit process. A simple structure might take 2-3 months once permits are in hand. A more complex build with plumbing/HVAC could take 4-6 months or more. Prefab options can be faster. We give realistic timelines upfront during planning.
  4. “Is the project ‘abortable’ if we change our minds or hit budget issues?”
    “Abortable” isn’t really a construction term, but we get the concern! While stopping mid-way is possible, it’s usually inefficient and costly. You might lose deposits, pay for partial work, and face disposal fees. This is why detailed planning and a solid budget are CRUCIAL upfront. Our thorough estimates and phased planning help minimize the risk of needing to stop unexpectedly. Open communication is key if challenges arise.

Ready to Make Your Backyard Dreams a Reality?

So, there you have it! Pool houses are way more than just sheds – they’re lifestyle enhancers, entertainer’s dreams, and value-boosters. Whether you envision a simple cabana for towels or a full-blown guest oasis, the key is smart planning and partnering with the right team.

At D&D Home Remodeling, we live and breathe transforming Bay Area backyards. We’re not just builders; we’re your neighbors in San Jose, passionate about creating spaces you’ll love for years. We handle everything from the initial dream session to the final walkthrough, making the process as smooth as our poolside margaritas (we’ll bring our own glasses, promise).

Stop just dreaming about that perfect poolside escape. Let’s build it together. Reach out to D&D Home Remodeling today for a friendly, no-pressure chat and a free estimate. Let’s turn your backyard into the ultimate staycation destination. What are you waiting for? Your pool (and your dry floors) will thank you!