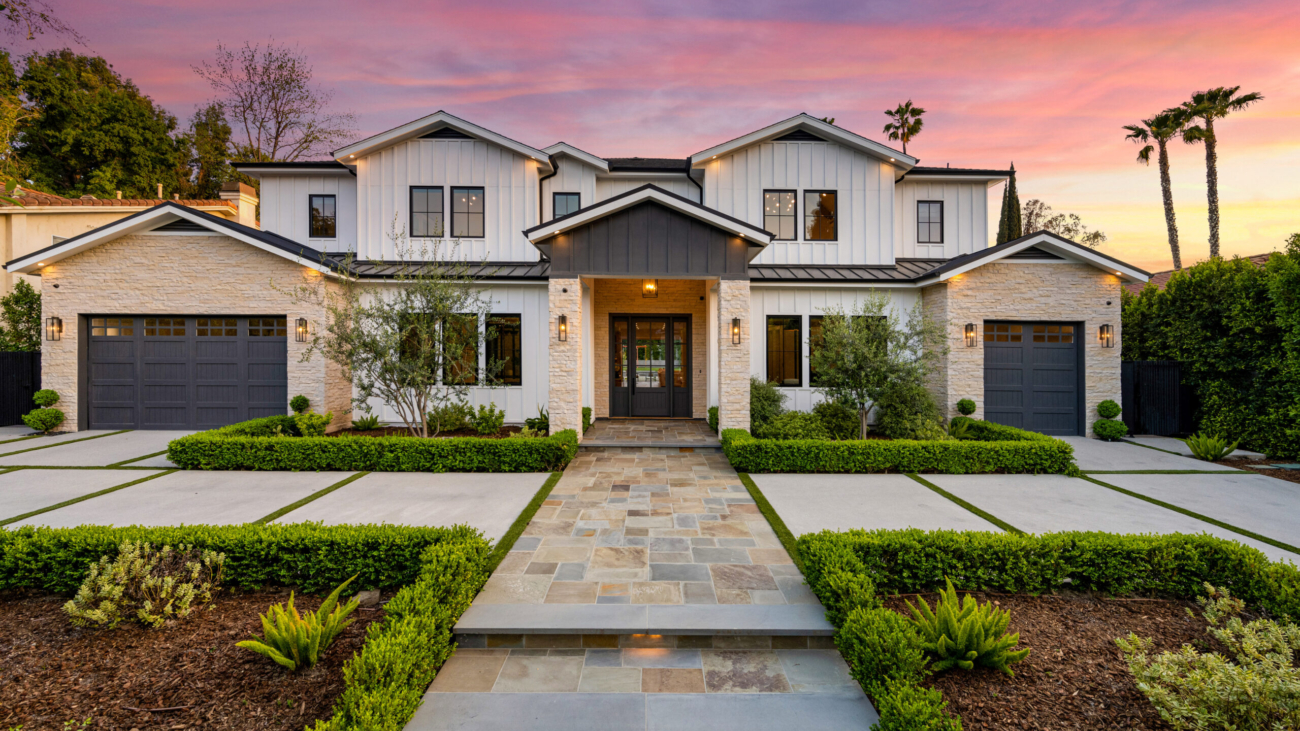
Modern white and stone house with a dark roof under a colorful sunset sky.

Exterior Home Remodel: Modernizing Mid-Century Facades

Unlocking Your Mid-Century Modern’s True Potential: A Facelift for the Future

Hey there, fellow design enthusiast! Have you ever driven around the beautiful neighborhoods of Silicon Valley—think Palo Alto, Los Gatos, or right here in San Jose—and spotted one of those cool, low-slung mid-century modern homes? You know the ones: clean lines, big windows, and a vibe that just screams “Mad Men” chic. They’re architectural gems, but let’s be honest, sometimes that 1960s exterior could use a little help to feel fresh and current.

We get it. We’re huge fans of this style, but we also know that living in a time capsule isn’t for everyone. Maybe the original wood siding is looking a bit tired, or the entryway feels underwhelming. That’s where we come in. At D&D Home Remodeling, we live for this stuff. We love nothing more than helping homeowners like you honor the past while boldly stepping into the future. So, grab a coffee, get comfortable, and let’s chat about transforming your mid-century facade into the envy of the block.

Why Modernize a Mid-Century Home Anyway?

First things first, why even bother? These homes are classics for a reason. Their design principles—open floor plans, integration with nature, minimalist aesthetics—are more popular now than ever. The goal of an exterior remodel isn’t to erase its character but to enhance it. We’re talking about boosting your curb appeal, increasing your home’s value (a big deal in the Santa Clara real estate market), and making it more energy-efficient and comfortable for modern living.

It’s about solving the problems those original materials are now presenting. Peeling paint, drafty windows, and faded finishes aren’t just eyesores; they can be a drain on your wallet. A thoughtful exterior remodel addresses all of this. And IMO, there’s no better project than one that makes your house look stunning and work smarter.

The Blueprint for a Stunning Exterior Transformation

Alright, let’s get into the nitty-gritty. How do we actually do this without committing some kind of architectural sin? It’s all about a respectful yet innovative approach. As a trusted general contractor in the Bay Area, we’ve developed a bit of a playbook for this.

Respect the Original Architecture (Seriously, Don’t Fight It)

The worst thing we can do is try to turn your rad mid-century modern into a fake Tuscan villa. It just won’t work, and frankly, it’ll look, well, a bit abortable. The key is to work with the home’s inherent style.

  • Embrace the Rooflines: Those low-pitched or flat roofs are iconic. Instead of changing them, consider a sleek, modern standing-seam metal roof. It’s a durable, contemporary material that perfectly complements the original aesthetic.
  • Celebrate the Lines: Horizontal lines are everything. Our job is to emphasize them, not break them up. This can be done through new siding, trim details, and even how we landscape.

A Material World: Choosing Your Home’s New Look

This is where the magic happens. Swapping out old materials for new ones is the fastest way to achieve a huge visual impact. But it’s not just about looks; it’s about performance.

Siding Solutions: Beyond the Classic Wood

Original redwood or cedar siding is beautiful, but it’s also high-maintenance. Today, we have amazing alternatives that give you that warm, natural look without the constant upkeep.

  • Fiber-Cement Board: This is our go-to recommendation for a reason. It’s incredibly durable, resistant to moisture and pests (take that, termites!), and can be stained or painted to mimic wood grain perfectly. It’s a workhorse.
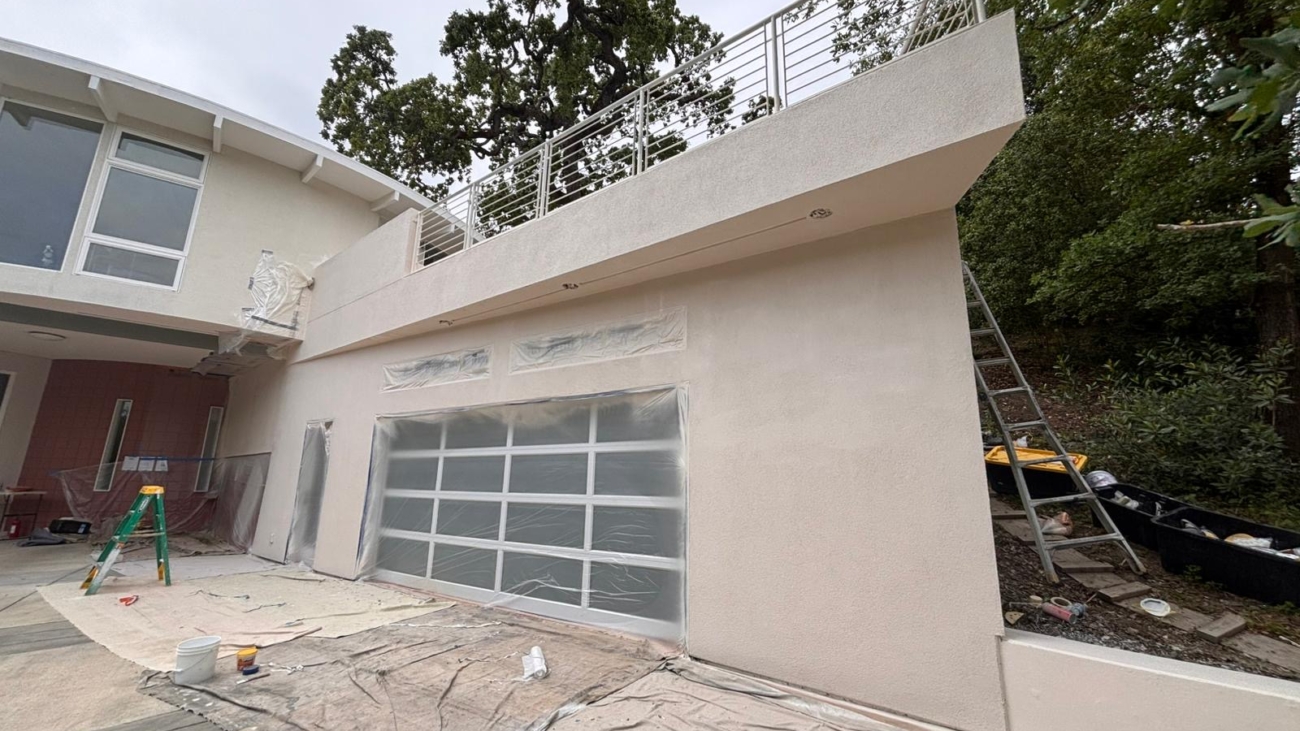
  • Modern Stucco: A fresh coat of stucco in a contemporary color palette (think warm grays, crisp whites, or even bold blacks) can instantly modernize the home while keeping its California vibe.
  • Metal Accents: Adding cor-ten steel or dark aluminum panels as accents can create stunning visual interest and highlight the home’s geometric form.

The Window of Opportunity

Those original steel-framed windows might be cool, but they are likely terrible insulators. Replacing them is one of the single best upgrades you can do for both aesthetics and energy efficiency. Opt for sleek, black-framed windows with minimal profiles. They maintain the minimalist look while drastically improving your home’s thermal envelope. FYI, this is one upgrade where you’ll really feel the difference on your energy bills.

The Power of Paint and Color

Never underestimate a paint job! Color is the cheapest and most powerful tool in our toolbox. Mid-century homes often featured earthy tones, but today’s modern interpretation isn’t afraid of contrast.

  • Go Bold with an Accent Color: Paint the front door a vibrant orange, a deep teal, or a sunny yellow to create a stunning focal point.
  • Monochrome Magic: A palette of various grays, blacks, and whites can look incredibly sophisticated and modern.
  • Let the Wood Shine: If the original wood is in good shape, consider just refinishing it and sealing it with a clear coat to protect it and let its natural beauty take center stage.

Let’s Talk Numbers: A Quick Guide to Exterior Material Choices

We know one of the biggest questions on your mind is about cost. It’s a fair question! While every project is unique, this table should give you a ballpark idea of what to expect for different material choices common in mid-century modern remodels.

Material Average Cost per Sq. Ft. (Installed) Key Benefits Best For
Fiber-Cement Board $12 – $18 Extreme durability, low maintenance, fire-resistant, wood-like appearance A long-term, resilient solution that looks authentic.
Modern Stucco $10 – $15 Seamless look, great for curves, wide color variety, good insulator Achieving that classic California smooth finish.
Engineered Wood $11 – $16 Authentic wood appearance, more stable & durable than traditional wood Homeowners who want the wood look with better performance.
Metal Panels (Accent) $15 – $25 Ultra-modern aesthetic, incredibly durable, recyclable Creating bold accent walls or highlighting architectural features.
Vinyl Siding $5 – $9 Most affordable, low maintenance, easy installation Budget-conscious projects where modern materials aren’t the focus.

Price is always a factor, but remember, investing in quality materials installed by a professional renovation contractor like us pays off in longevity and curb appeal.

Beyond the Walls: The Finishing Touches

An exterior remodel isn’t just about the siding and windows. It’s the entire package. Think of these as the accessories that complete the outfit.

  • Landscaping: Use drought-tolerant plants, gravel, and sleek concrete pavers to create a landscape that complements the architecture, not fights it.
  • Lighting: Update those old porch lights with sleek, contemporary sconces. Add some subtle path lighting to highlight your home’s best features at night.
  • The Front Door: This is the handshake of your home. Make it a good one! A new, statement-making door can completely redefine your entryway.
  • Hardscaping: A new walkway or a redesigned porch stoop can tie the whole look together.

Why This Isn’t a DIY Project (And When to Call the Pros)

We love a good DIY challenge as much as the next person, but exterior remodeling on a home of this style is a job for a professional general remodeling team. Why? Because it’s not just about nailing up new siding. It’s about understanding moisture barriers, structural integrity, and preserving the architectural intent. One wrong move and you could create a water intrusion nightmare or, worse, ruin the clean lines that make the house special.

This is where finding the best remodeling company for the job is crucial. You need a house remodeling contractor with experience in both modern design and the nuances of older homes. A team that knows the permitting process in San Jose, Campbell, and Cupertino can save you months of headaches. That’s the expertise we bring to every project at D&D Home Remodeling. We handle the complicated stuff so you can just enjoy the exciting part: watching your vision come to life.

Your Mid-Century Modern Exterior Remodel Questions, Answered

We hear a lot of the same great questions from homeowners in Santa Clara, Sunnyvale, and Morgan Hill. Here are a few of the most common ones.

How much does a full exterior remodel actually cost?

This is the million-dollar question (though hopefully not literally!). The price truly depends on the size of your home, the materials you choose, and the scope of work. A simple paint job and new front door will cost a fraction of a full home remodel that includes new siding, windows, and a roof. The best way to get an accurate idea is to get a personalized quote. When you search for “exterior remodeling near me,” make sure the company is transparent about their pricing structure.

Will I need to move out during the project?

Nope! That’s the beauty of an exterior project. Life inside your home can continue pretty much as normal. It might get a bit noisy during the day, but you won’t have to deal with the disruption of a bathroom remodeler working inside your space.

How long will the project take?

A typical exterior remodeling project for a mid-century home can take anywhere from 4 to 12 weeks. This timeline includes everything from pulling permits to the final walkthrough. Material availability and weather can play a role, but a good general contractor will give you a realistic timeline upfront and keep you updated every step of the way.

Can we add a new entryway or porch?

Absolutely! Many mid-century homes have modest entries. A well-designed home additions project like expanding the covered entry or adding a new porch can dramatically improve your home’s functionality and curb appeal. It’s a fantastic way to blend old and new.

Ready to See Your Home in a Whole New Light?

There you have it. Modernizing your mid-century facade is all about balance: respecting its history while equipping it for the future. It’s one of the most rewarding projects we do because the transformation is so immediate and dramatic.

If you’ve been dreaming about a new look for your home in Silicon Valley—whether you’re in Fremont, Saratoga, Milpitas, or right here in San Jose—we should talk. At D&D Home Remodeling, we’re not just another renovation contractor; we’re your partners in creating a home that’s as unique as you are. We’ll guide you through every decision, from material selection to the final cost, ensuring the process is smooth and the results are stunning.

So, what are you waiting for? Let’s stop talking about it and start building it. Give us a call today, and let’s make your mid-century modern the talk of the neighborhood (in a good way, we promise).

Interior of a room under construction with drywall installed

Bathroom Remodeler Guide: Heated Floors Worth The Investment?

Title: Bathroom Remodeler Guide: Heated Floors Worth The Investment?

Let’s be honest for a second. Is there anything more brutally effective at shocking you awake in the morning than the icy-cold kiss of a tile floor on your bare feet? It’s a rude awakening we’ve all experienced. Now, imagine a different reality. You swing your feet out of bed and onto a deliciously warm floor. It feels like a luxury, but is it a practical upgrade for your bathroom remodel, or just an expensive indulgence?

As a bathroom remodeler at D&D Home Remodeling here in San Jose, this is a question we get all the time. We’re going to walk you through the real deal on heated floors—the good, the pricey, and the wonderfully toasty. By the end, you’ll know exactly whether this upgrade is the right move for your home.

What Exactly Are We Talking About Here?

At its core, a radiant floor heating system is exactly what it sounds like: a method of warming your floor (and consequently, the room) from the ground up. It’s like giving your floor a cozy electric blanket. There are two main types we install, and the choice between them often comes down to your project’s specifics.

Electric Systems (The Retrofit Rockstar)
These systems use thin, flexible heating cables or pre-wired mats that we install directly under your tile, stone, or laminate flooring. They’re our go-to for most bathroom remodels, especially smaller projects or retrofits where we’re not tearing up the entire subfloor.

  • Pros: Thinner profile, easier and faster to install in existing homes, heats up quickly (usually within 30-60 minutes).
  • Cons: Can be a bit more expensive to operate, depending on your electricity rates.

Hydronic Systems (The Whole-House Powerhouse)

This system pumps heated water from your boiler through a network of tubing installed beneath the floor. It’s incredibly efficient for heating large areas or even an entire floor of your home.

  • Pros: Extremely energy-efficient to operate, ideal for whole-home heating or large home additions.
  • Cons: Higher upfront installation cost and a more complex installation process that’s best done during a full home remodel or new construction.

Why We’re Absolutely Sold on Warm Floors

Sure, the pure, unadulterated comfort is the headline act. But the benefits go way beyond just happy feet.

Pure, Unfiltered Luxury (That’s Actually Practical)
Walking into a warm bathroom on a chilly Silicon Valley morning is a game-changer. It transforms the entire experience from a functional routine into a spa-like retreat. It’s the kind of upgrade that makes you smile every single day. IMO, that’s worth a lot.

Energy Efficiency You Can Feel Good About
Radiant heat operates at a lower temperature than forced-air systems because it heats mass (the floor and your feet) directly, not just the air. This means your thermostat can be set lower while you feel just as warm. For a region that’s conscious about energy, even here in sunny California, that’s a win.

Goodbye, Drafty Cold Spots
Forced-air heat rises and collects near the ceiling, leaving the floor—you know, where you actually are—the coldest part of the room. Radiant heat eliminates this completely, providing a consistent, even warmth from the ground up. No more cold toes. Ever.

Allergy-Friendly and Silent Operation
Since there’s no blast of air, there’s no blowing dust, allergens, or pet dander around the room. It’s also completely silent. The only way you know it’s on is by the blissful warmth underfoot.

Let’s Talk About the Elephant in the Room: The Cost

Alright, let’s get down to brass tacks. This is the part that makes most people pause. We won’t sugarcoat it; adding heated floors isn’t the cheapest option.

The price for a professionally installed electric system in a standard bathroom (think 30-50 sq. ft.) typically ranges from $600 to $1,200 for the system and installation. For larger master bathrooms, you might be looking at $1,500 to $2,500.

Hydronic systems have a much higher upfront cost because of the boiler integration and complex tubing installation, often starting around $6,000 and going up from there for a whole-house solution.

But here’s the key perspective we give all our clients in Santa Clara, Campbell, and beyond: think of it as an investment, not just an expense.

  • It adds real value to your home. A luxurious, energy-efficient feature like this is a major selling point.
  • The operational cost is often lower than you think, especially if you use a programmable thermostat to only heat the floor when you need it (e.g., in the morning and evening).
  • When bundled with your overall bathroom remodeler project, the installation cost becomes more abortable. Since we’re already managing the demolition and floor installation, adding the heating system integrates seamlessly into the process.

Here’s a quick breakdown to help you visualize the cost factors:

Factor Electric System Hydronic System
Best For Bathroom remodels, retrofits, smaller spaces Whole-home heating, new construction, large home additions
Installation Complexity Moderate (often DIY-able, but we don’t recommend it) High (requires a professional general contractor)
Material Cost $5 – $12 per sq. ft. $6 – $20+ per sq. ft. for tubing
Installation Cost $300 – $700 (for a standard bath) $6,000+ (full system installation)
Operating Cost Higher (uses electricity) Lower (uses gas, oil, or solar)
Warm-Up Time 30 – 60 minutes Several hours

So, Is It REALLY Worth It For You?

This isn’t a one-size-fits-all answer. It depends on your budget, your goals, and frankly, how much you hate cold floors.

Heated floors are 100% worth the investment if:

  • You are already planning a bathroom remodel and have the floor open. This is the perfect time.
  • You live in a colder microclimate (yes, some parts of Silicon Valley get downright chilly!).
  • You value daily luxury and plan to stay in your home for years to enjoy it.
  • You’re looking for smart, efficient ways to increase your home’s value.

You might want to skip it if:

  • You’re on an extremely tight budget for your remodel.
  • You live in a super warm area and your bathroom is already toasty.
  • You’re planning to sell your home immediately, as you may not recapture 100% of the investment.

FYI, most of our clients who opt for heated floors tell us it’s their favorite part of the entire renovation. They never regret it.

How a Professional General Contractor Makes It Happen

This isn’t a project we recommend for the casual DIYer. Getting it wrong means no heat, or worse, a damaged floor. A reputable general remodeling company like ours handles it as part of the full scope of work:

  1. Design & Planning: We help you choose the right system and plan the thermostat placement.
  2. Subfloor Prep: We ensure the subfloor is clean, level, and ready for installation.
  3. Installation: Our trained technicians meticulously lay the mats or cables, following the manufacturer’s specs to the letter.
  4. Testing: We always test the system for continuity and proper function before the new floor covering goes down. This is non-negotiable.
  5. Flooring Installation: Your tile-setter or floor installer then places the final floor directly over the heating system using a compatible mortar.
  6. Final Connection: We connect the system to its dedicated thermostat and give you a full tutorial on how to use it.

Trying to find a “bathroom remodeler near me” who has specific experience with these systems is crucial. You don’t want the best remodeling company for exterior remodeling trying to figure it out on the fly in your bathroom.

Your Heated Floor Questions, Answered

How much does it really add to my electric bill?

For an average bathroom, if you run an electric system for a few hours each day, expect a minimal impact—maybe $10 to $20 per month during colder months. Using a programmable thermostat is the key to keeping costs low.

Can I add heated floors to an existing bathroom without a full remodel?
It’s very difficult. The floor covering needs to be removed to install the system. While some ultra-thin systems exist, a full bathroom remodeler project is the ideal time to do it. If you’re not ready for a full remodel, it’s probably not worth the hassle and cost to tear up just the floor.

What floor coverings work best with radiant heat?
Tile and stone are the champions. They conduct and retain heat beautifully. Engineered wood, laminate, and luxury vinyl plank (LVP) can also work, but it’s critical to check the manufacturer’s specifications for maximum allowable floor temperature to avoid damage. Solid hardwood is generally not recommended.

How long do heated floors last?
The heating elements themselves are typically warrantied for 25-30 years and often last much longer. The thermostat is the only component that might need replacing sooner, similar to any other electronic device in your home.

The Bottom Line: Stop Shivering and Start Dreaming

At the end of the day, a radiant floor heating system is one of those rare upgrades that is both an incredible luxury and a genuinely practical improvement. It’s not just about warmth; it’s about comfort, efficiency, and adding a touch of pure bliss to your daily routine.

If you’re remodeling your bathroom in San Jose, Milpitas, Saratoga, or anywhere in the South Bay, and you’re curious about making heated floors a reality, let’s chat. At D&D Home Remodeling, we’ve guided countless homeowners in Fremont, Sunnyvale, and Los Gatos through this exact decision. We can give you a clear, upfront cost analysis for your specific project and show you how to make it work within your vision.

Life’s too short for cold floors. Let’s make your bathroom the warm, welcoming oasis it deserves to be.

Modern bathroom with dark marble walls and a wooden vanity

Transforming Eichler Homes: The Ultimate Guide to Specialized San Jose Remodeling That Preserves Mid-Century Soul

Your Eichler isn’t a relic of the past—it’s a living, breathing piece of California’s architectural history that simply needs the right hands to guide it into the future. If you own one of these mid-century modern masterpieces in San Jose, the Peninsula, or anywhere across Silicon Valley, you’ve experienced the magic: the post-and-beam construction that feels like a forest canopy indoors, the walls of glass that dissolve the line between living room and garden, the open floor plan that was hosting “great rooms” decades before HGTV discovered the term. And you’ve also felt the less magical moments: the draft from single-pane windows that could fund your winter vacation, the radiant heating system that keeps you up at night wondering when it might fail, the kitchen that still functions like it’s 1962.

The question isn’t whether to remodel. It’s how to remodel without losing the very qualities that made you fall in love with the home in the first place. That’s what sets apart the best San Jose Eichler home remodeling specialists: an understanding that you’re not just updating a house—you’re stewarding an architectural legacy.

Why Eichlers Demand Specialized Remodeling Expertise

Joseph Eichler and his architects—Anshen & Allen, Jones & Emmons, and Claude Oakland—created something unique. Between 1949 and 1974, Eichler built approximately 11,000 homes, with the vast majority located in Northern California, including significant concentrations in San Jose, Palo Alto, Mountain View, and Sunnyvale. These homes weren’t just structures; they were a philosophy. Eichler believed that good design should be accessible to the average American family, and he brought modernist principles—open plans, indoor-outdoor living, and honest materials—to the suburban tract house.

That philosophy, however, comes with a set of construction realities that make a general contractor’s playbook largely irrelevant.

The Good, The Challenging, and The Radiant (Heat)

The very features that make an Eichler an Eichler are the ones that demand specialized knowledge:

  • Post-and-Beam Construction: The exposed structure is the defining aesthetic. Running new electrical, plumbing, or HVAC through these spaces requires careful planning and often creative, non-invasive solutions. You can’t simply drop a soffit to hide ductwork without destroying the visual integrity of the home.

  • Floor-to-Ceiling Glass Walls: These are the soul of indoor-outdoor living. The original single-pane glazing, however, offers thermal performance roughly equivalent to an open window. Upgrading to dual-pane, low-e glass is essential, but it must be done with an understanding of sightlines, mullion patterns, and the overall transparency that defines the Eichler experience.

  • Radiant Heating in the Slab: On a cold winter morning, stepping onto a gently warmed concrete floor is one of life’s quiet luxuries. The original hydronic systems, with copper pipes embedded in the concrete foundation, are a different story. They’re efficient when they work, but a pinhole leak can be catastrophic, requiring invasive slab cutting or a complete system replacement. As Eichler expert John Klopf notes, “Eichler homes have no energy efficiency whatsoever” in their original state.

  • Flat or Low-Sloped Roofs: No attic to speak of. This is the single biggest challenge for modernization. In a conventional home, the attic is a highway for new electrical, plumbing, and ductwork. In an Eichler, that infrastructure must be routed through walls, under the slab, or along the roof deck—all while preserving the clean ceiling lines.

  • Mahogany Paneling and T&G Ceilings: These warm wood surfaces are irreplaceable. Sanding, refinishing, or carefully matching new wood to old is an art form. Painting them white is, to put it mildly, architectural sacrilege.

A general remodeling company might see these features as problems to be removed. A specialized Eichler remodeler in San Jose sees them as cherished features to be preserved, restored, or thoughtfully upgraded with period-appropriate materials and techniques.

San Jose-Specific Considerations

Remodeling an Eichler in San Jose comes with its own set of regional factors that savvy homeowners and contractors must navigate:

  • Climate Zones: San Jose spans multiple microclimates. Homes in the Willow Glen or Rose Garden areas may have different heating and cooling demands than those in the Almaden Valley foothills. Understanding local sun exposure, prevailing winds, and seasonal temperature swings is crucial for specifying the right energy upgrades.

  • Local Building Codes and Permitting: The City of San Jose has specific requirements for energy compliance (Title 24), seismic retrofitting, and historic preservation. Working with a contractor who has successfully navigated the San Jose permit process for Eichler remodels can save months of delays and thousands in unexpected costs.

  • Seismic Retrofitting: Eichlers, with their post-and-beam construction and large glass expanses, present unique seismic vulnerabilities. Bolting the house more securely to the slab foundation is one of the most cost-effective safety upgrades an Eichler homeowner can make. A specialized contractor will know how to integrate seismic upgrades discreetly.

  • Eichler Neighborhood Clusters: San Jose is home to several iconic Eichler tracts, including Fairglen, Fairlawn, and other developments in Willow Glen, as well as pockets in Cambrian and West San Jose. These neighborhoods often have active homeowner communities and shared knowledge about common issues and trusted vendors.

The Heart of the Eichler: Kitchen & Bath Transformations

This is where most homeowners start. Why? Because these rooms often feel the most dated, and they’re where the tension between mid-century soul and modern function is most acute.

The Kitchen: Where Mid-Century Meets Modern

A 1950s kitchen in 2026 presents a challenge. The “soul” of the space—the mahogany cabinets, sliding cabinet doors, the globe lights, the connection to nature—is perfect. But the “tech”—the loud dishwasher, the lack of outlets, the electric coil cooktop—is obsolete. The goal of a successful Eichler kitchen renovation is not to make it look like a new construction farmhouse; it is to make it look like Joseph Eichler just built it today.

Key Principles for Eichler Kitchen Remodels:

The “Flying Coffin” Dilemma: The term refers to the upper kitchen cabinets suspended from the ceiling beams, floating above the peninsula. They’re iconic, but they block views and often cut the cook off from the party. Solutions include:

Cabinetry: Do not put Shaker cabinets in an Eichler. The frame-and-panel construction clashes violently with the clean, horizontal lines of post-and-beam architecture. The answer is slab or flat-panel doors in natural walnut (which connects visually with the ceiling decking) or matte period-correct colors like muted teal, moss green, or soft charcoal.

Appliances: In a Victorian, the stove is a hearth. In an Eichler, appliances should disappear. Panel-ready refrigerators and dishwashers that blend into the cabinetry, induction cooktops that don’t dominate the space, and downdraft ventilation that preserves the open sightlines are all essential.

Openness: Removing non-load-bearing walls to integrate the kitchen seamlessly into the living area is almost always the right move. This enhances the famous Eichler flow and allows the cook to remain part of the conversation.

The Bathroom: Spa-Like Retreat with Mid-Century Bones

An Eichler bathroom should feel light, airy, and connected to the outdoors. We use large-format tiles, floating vanities, and strategically placed skylights to maintain that spacious, organic feel. It’s about creating a spa-like retreat that still whispers 1965. Key considerations include:

  • Curbless Showers: A curbless entry enhances the clean lines and creates a more accessible, open feel.

  • Floating Vanities: These maintain the visual lightness of the space and echo the mid-century preference for furniture-like fixtures.

  • Skylights: Solatubes or traditional skylights bring in natural light and create a connection to the sky, a hallmark of Eichler design.

  • Large-Format Tiles: Minimizing grout lines keeps the look clean and modern, while earthy tones and textures tie back to the natural materials used throughout the home.

Beyond the Interior: Exterior Remodeling and Home Additions

Maybe you need more space. An Eichler addition is a serious undertaking, but when done right, it’s pure magic. The challenge is making it look like it was always there.

Blending the Old with the New

Whether you’re in Santa Clara, Campbell, or Saratoga, the goal is the same: respect the roofline, match the materials, and extend the post-and-beam language seamlessly. A successful addition is invisible—it feels like a natural extension of the original home.

Key considerations for Eichler additions:

  • Roofline Continuity: Eichlers typically have flat or low-sloped roofs. Extending this plane, or creating a compatible shed roof, is essential for visual harmony.

  • Material Matching: Sourcing siding that matches the original scored plywood or vertical board-and-batten is critical. Even slight variations in groove spacing can be noticeable.

  • Post-and-Beam Extension: The addition should continue the structural rhythm of the original house, with exposed beams that align visually with the existing framing.

  • Atrium Integration: Many successful additions incorporate or expand the central atrium, using it as a connective element between old and new spaces.

Navigating the Remodeling Process: A Phased Approach

A thoughtful Eichler remodel is a marathon, not a sprint. Here’s a phased approach that minimizes disruption and maximizes results:

Phase 1: Discovery and Planning (Months 1-3)

  • Hire an Eichler-Specialist Architect or Design-Build Firm: This is non-negotiable. Interview firms with a proven portfolio of Eichler work in the Bay Area. Ask to see examples of how they’ve handled radiant heat replacement, window upgrades, and additions.

  • Conduct a Thorough Home Assessment: Document everything: roof condition, radiant system pressure test, electrical panel capacity, window leaks, and any signs of foundation movement.

  • Define Your Scope and Budget: Be realistic about costs. A full Eichler remodel in the Bay Area can range from $300 to $500+ per square foot depending on the level of finish and complexity.

Phase 2: Design and Permitting (Months 4-8)

  • Develop Detailed Plans: Work with your architect to create plans that address all your needs while preserving the home’s character.

  • Navigate San Jose Permitting: Your contractor should handle this, but be prepared for a process that can take 3-6 months, especially for additions or major structural changes.

Phase 3: Construction (Months 9-18+)

  • Phase Construction to Minimize Disruption: Tackle the most invasive work first (radiant heat replacement, major structural changes), then move to kitchens and baths, and finish with cosmetic updates.

  • Maintain Open Communication: Regular walkthroughs with your contractor and architect are essential to catch issues early and ensure the vision is being executed correctly.

Phase 4: Finishing and Landscaping (Months 18-24)

  • Landscape Integration: The Eichler philosophy extends to the outdoors. Use drought-tolerant, mid-century-appropriate plantings like ornamental grasses, succulents, and Japanese maples to frame the glass walls.

  • Final Touches: Lighting, hardware, and furnishings should all be selected with the mid-century modern aesthetic in mind.

Detailed Comparison: Common Eichler Remodeling Approaches and Their Impact

This table provides a practical framework for evaluating upgrade options based on their impact on both performance and preservation of the home’s architectural integrity:

Upgrade Category What NOT to Do The Eichler-Savvy Approach Estimated Cost Range (Bay Area) Preservation Impact Performance Impact
Windows & Glazing Replace with standard vinyl windows with thick muntins. Install dual-pane, low-e aluminum or wood-clad windows with slim profiles that match original sightlines. $1,500 – $3,500 per opening High: Preserves transparency and architectural character. High: Reduces heat loss/gain by 50%+; improves comfort.
Roofing & Insulation Add a new pitched roof or drop ceilings for insulation. Use rigid foam insulation above the roof deck (if re-roofing) or spray foam in the roof cavity (carefully to avoid trapping moisture). Maintain flat profile. $25 – $50 per sq. ft. (roof replacement with insulation) High: Maintains the iconic flat roofline. High: Dramatically reduces energy loss through the roof.
HVAC & Heating Install traditional forced-air with bulky ductwork in soffits. Replace old radiant boiler with high-efficiency condensing boiler or air-to-water heat pump. Add mini-split heat pumps for cooling, with discreet wall-mounted units or concealed ducted units. $15,000 – $40,000+ (full system replacement) High: Preserves open ceilings and slab heat comfort. Very High: Efficient heating and cooling with minimal visual impact.
Kitchen Cabinetry Install Shaker-style cabinets with ornate hardware. Use flat-panel slab doors in walnut or matte period-correct colors. Install edge pulls or minimalist hardware. $30,000 – $80,000+ (full kitchen) Very High: Essential for maintaining mid-century aesthetic. High: Modern storage and workflow.
Bathroom Fixtures Install bulky, traditional vanities and ornate tile. Use floating vanities, large-format tiles, curbless showers, and simple, geometric fixtures in brushed nickel or matte black. $15,000 – $40,000+ (per bathroom) High: Maintains the light, airy Eichler feel. High: Modern plumbing, water efficiency, and accessibility.
Lighting Install recessed can lights indiscriminately. Use track lighting along beams, period-appropriate globe pendants, and wall sconces. Layer ambient, task, and accent lighting with warm LED bulbs (2700K-3000K). $2,000 – $8,000+ (whole-home upgrade) Very High: Lighting defines the mid-century mood. High: Energy-efficient LEDs with superior light quality.
Flooring Cover original concrete or vinyl with wall-to-wall carpet. Restore and polish original concrete slabs. Use large-format porcelain tiles or natural linoleum (Marmoleum) in period-appropriate colors. $8 – $20 per sq. ft. High: Preserves the connection to the slab and material honesty. Moderate: Improves durability and ease of maintenance.
Exterior Additions Add a second story or a bulky addition that breaks the roofline. Extend the home horizontally, matching the original post-and-beam rhythm and low-slope roof. Use matching siding materials and window patterns. $400 – $600+ per sq. ft. Critical: Must be invisible to preserve architectural integrity. High: Adds functional square footage without compromising design.
Seismic Retrofitting Ignore it. Bolt the house to the foundation, add shear walls where needed, and reinforce post-to-beam connections. This is a critical safety upgrade for Bay Area Eichlers. $5,000 – $15,000 High: Protects the home and its occupants. Critical: Essential for safety and insurance purposes.

Working with D&D Home Remodeling: Your San Jose Eichler Specialists

At D&D Home Remodeling, we don’t just work on Eichlers; we’re stewards of their legacy. We understand that your home is more than a building—it’s a piece of California’s architectural history and the backdrop for your family’s life. Our approach is grounded in three core principles:

  1. Preservation First: We always seek to restore and preserve original features before considering replacement. A beautifully refinished mahogany wall or a polished concrete slab is irreplaceable.

  2. Thoughtful Modernization: When upgrades are necessary, we specify materials and systems that enhance performance while respecting the home’s original design intent. We never sacrifice character for convenience.

  3. Transparent Collaboration: We believe the best results come from a true partnership between homeowner, architect, and builder. We’ll guide you through every phase of the process, from initial design to final walkthrough, with clear communication and realistic expectations.

Whether you’re looking for a full home remodel, a kitchen transformation, a bathroom upgrade, or a seamless addition, we bring decades of specialized experience to every project. We eat, sleep, and breathe Eichlers—and we’d be honored to help you write the next chapter in your home’s story.

Ready to Honor Your Eichler’s Legacy?

Your Eichler isn’t broken. It just needs an upgrade from a team that speaks its language. Contact D&D Home Remodeling today to schedule a consultation and discover how we can transform your San Jose Eichler into a home that’s as functional as it is beautiful—without losing an ounce of its mid-century soul.

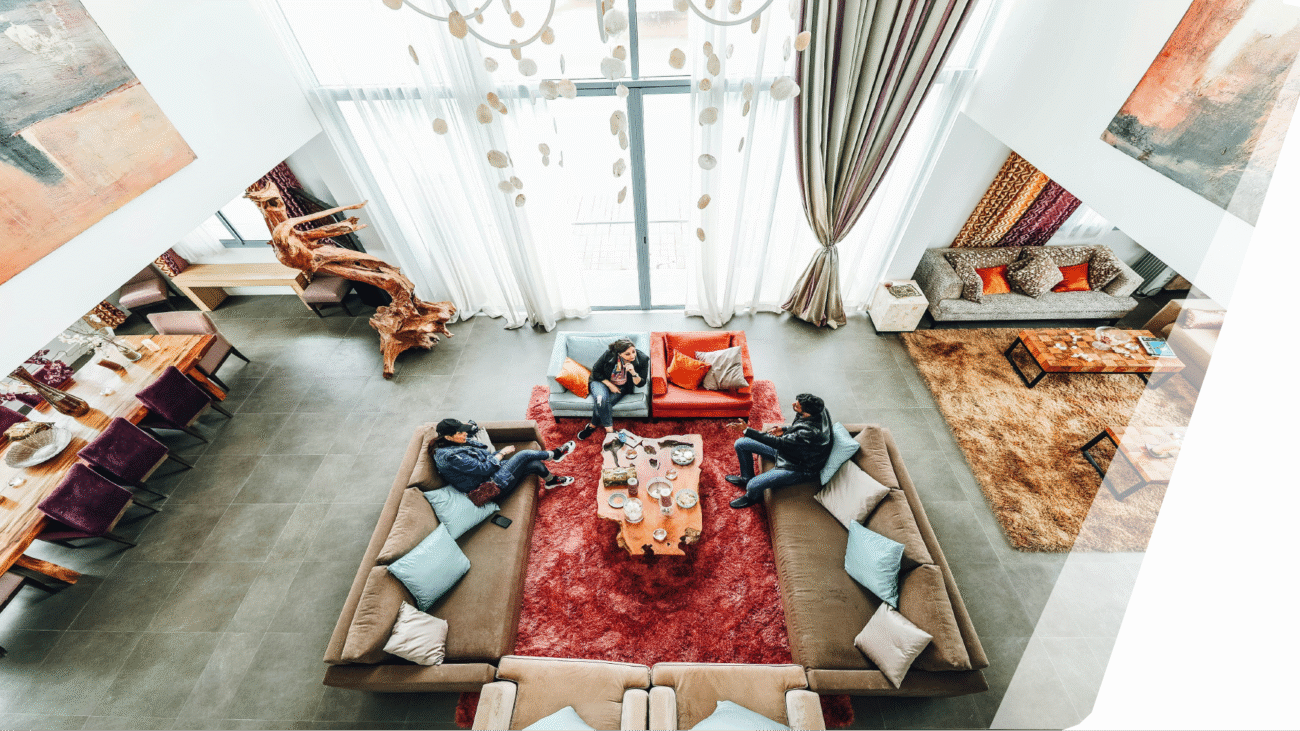
Modern open-plan living room and kitchen with brown leather sofa

Kitchen Remodeler Secrets For Space-Efficient Galley Layouts

Of course. Here is the 1800-word SEO article, crafted to your precise specifications.


Unlocking the Potential: Kitchen Remodeler Secrets for Space-Efficient Galley Layouts

Let’s be honest, when most people dream of their perfect kitchen, they’re picturing a massive, sprawling island with room for a dozen guests. But what if your reality is a long, narrow galley kitchen? It can feel a bit like the universe is playing a joke on you, right? You open the dishwasher and block the oven, or you have to perform an intricate dance just to let someone else grab a fork.

Well, we’re here to let you in on a little secret: we love a galley kitchen. Seriously. At D&D Home Remodeling in San Jose, we see these spaces not as limitations, but as opportunities for some of the most efficient, functional, and downright stylish kitchens on the block. Forget everything you think you know. A galley layout, when done right, is a powerhouse of culinary efficiency. So, grab a coffee, and let’s chat about how to transform that narrow passage into your favorite room in the house.

Why We’re Secretly Obsessed With Galley Kitchens

Ever wondered why restaurant kitchens are almost always laid out this way? It’s because the galley is the ultimate workflow machine. Think about it: everything is within arm’s reach. You can pivot from the fridge to the sink to the stove without taking a single step. That’s not a design flaw; it’s the “work triangle” on steroids. For those of us in the general remodeling business, getting to optimize this layout is like solving a fantastic puzzle. The goal isn’t to fight the galley; it’s to embrace it and make it work smarter, not harder.

The Golden Rule: Smart Storage is Everything

You can have the most beautiful countertops in the world, but if you’re constantly battling clutter, you’ll never enjoy your space. In a galley kitchen, every single inch counts. And we mean every. inch.

Go Vertical, Always
Look up. What’s above your cabinets? Probably a dust collection zone. We’re huge advocates for taking those cabinets all the way to the ceiling. You gain a surprising amount of storage for those once-a-year items like the giant turkey roaster or the holiday platters. No more dead space.

The Magic of Custom Interiors
Standard shelving is, IMO, a total waste. This is where custom solutions from a skilled renovation contractor make all the difference. We’re talking about:

  • Pull-out pantries: These skinny units can slide right into a space as narrow as 12 inches and hold an incredible amount of food.
  • Tray dividers: Built right into your lower cabinets to keep baking sheets and cutting boards organized.
  • Deep drawers: Seriously, forget about lower cabinets with doors. Deep, full-extension drawers are a game-changer. You can see and access everything in the back without performing yoga poses.
  • Toe-kick drawers: That little space under your cabinets? Yeah, that’s prime real estate for flat baking sheets or even a step stool for the kids.

When you work with a house remodeling contractor who thinks like this, you’re not just getting new cabinets; you’re getting a completely new system for living.

Countertop Conundrums: Maximizing Your Workspace

This is the big one. The eternal struggle of the galley kitchen: where do I put everything? The secret isn’t just more counter space; it’s smarter counter space.

The Continuous Countertop
One of our favorite tricks is using a single, uninterrupted slab of countertop material along one entire side of the galley. This creates a seamless, expansive-looking workspace that’s easy to clean and fantastic for food prep.

The Appliance Garage
Tired of your countertop looking like a small appliance convention? Tuck them all away in a dedicated cabinet with a tambour door—an appliance garage. It keeps your blender, toaster, and stand mixer handy but out of sight, instantly decluttering your visual space.

The “Breakfast Bar” Peninsula
If your galley kitchen has a dead end (instead of a pass-through to another room), we have an amazing trick. We can extend one of the countertops to form a small peninsula or breakfast bar. This adds precious seating and extra prep space without breaking the bank like a full home additions project would. It’s a total win-win.

Lighting & Illusion: Making It Feel Bigger

A dark galley kitchen can feel like a cave. But with the right lighting, we can make it feel open, airy, and much larger than it actually is.

Layer Your Light
Forget the single, sad ceiling fixture in the middle of the room. We create layers:

  1. Ambient Light: This is your overall illumination. Recessed LED cans are a must for general brightness.
  2. Task Light: Under-cabinet lighting is non-negotiable. It banishes shadows from your countertops, making cooking safer and more enjoyable.
  3. Accent Light: A small pendant light over the sink or a few LED strips inside glass-front cabinets adds a touch of personality and depth.

Reflective Surfaces are Your Best Friend

This is Design 101, but it works every time. High-gloss cabinets, a glossy tile backsplash, and reflective countertops like quartz or polished granite will bounce light around the room. Even a strategically placed mirror on a facing wall can work wonders. It’s one of the oldest tricks in our book, and it never gets old.

Appliance Strategy: Sleek, Streamlined, and Smart

Bulky appliances can choke a galley kitchen. The key is to choose models that are designed for tight spaces.

Integrated is King
Want that seamless, built-in look? Integrated appliances that are hidden behind cabinet panels are the ultimate solution for a streamlined aesthetic. Your fridge and dishwasher just blend right into the millwork.

Consider Scale
You might not need that massive 36-inch wide commercial range. A sleek 30-inch model, or even an induction cooktop, can offer all the power you need without dominating the visual space. And a counter-depth refrigerator is worth its weight in gold for saving those precious few inches of walkway space.

Galley Kitchen vs. Other Layouts: A Quick & Dirty Comparison

Wondering how your galley stacks up? Here’s a quick breakdown from our perspective as a general contractor who has seen it all.

Feature Galley Kitchen L-Shaped Kitchen U-Shaped Kitchen Island Kitchen
Efficiency Excellent (The “work triangle” is ultra-compact) Good Very Good Varies (can be great or terrible)
Space Required Low (Perfect for narrow spaces) Moderate High Very High
Cost Often Lower (Less cabinetry & countertop) Moderate Higher Highest (Island adds significant cost)
Traffic Flow Can be poor if it’s a main thoroughfare Good Excellent Can be problematic if not sized correctly
Storage Potential Good (with smart solutions) Very Good Excellent Excellent
Social Cooking Poor (Cook is often facing the wall) Good Good Excellent

See? The galley has some serious advantages, especially when it comes to cost and pure efficiency.

When to Call in the Pros (Like Us!)

Look, we’re all for a good DIY project. But a kitchen remodel, especially in a tight space, is a complex beast. The plumbing, electrical, and structural elements have to be perfect. Making a mistake here isn’t just annoying; it can be downright dangerous and incredibly costly to fix.

This is where working with the best remodeling company for the job pays for itself. At D&D Home Remodeling, serving San Jose, Santa Clara, Campbell, and all across Silicon Valley, we’ve mastered the art of the galley. We know how to squeeze every ounce of functionality out of your footprint. Why struggle with layouts and permits when you can have a team that handles it all, ensuring the project is smooth and, most importantly, abortable in the sense that you have clear milestones and approvals every step of the way? You’re in control.

And hey, while we’re your kitchen remodeler, remember we’re also a top-tier bathroom remodeler and handle exterior remodeling. If you love the work we do in your kitchen, we’d be thrilled to help you with the rest of your full home remodel dreams. Whether you’re in Milpitas, Saratoga, Sunnyvale, Los Gatos, Cupertino, Fremont, or Morgan Hill, we’re your local experts ready to help.

Your Galley Kitchen Questions, Answered

We get it. You have questions. Let’s tackle some of the most common ones head-on.

1. What is the ideal width for a galley kitchen?
You’ll want a minimum of 7 to 8 feet between the two rows of cabinets to allow for comfortable appliance door opening and for two people to pass each other (without the awkward side-shuffle). If you have the space, 9 to 10 feet is even better. Anything less than 7 feet starts to feel tight.

2. How can I make my galley kitchen feel less closed-in?
We covered this a bit, but the big ones are: Light colors on cabinets and walls, great lighting (especially under-cabinet), glossy finishes to reflect light, and open shelving or a couple of glass-front cabinets to create visual breaks. Sometimes, we can even replace a solid wall with a half-wall or peninsula to open it up to an adjacent room.

3. Are open shelves a good idea in a small galley kitchen?
This is a style and maintenance choice. Open shelves can make the space feel more open and less bulky than upper cabinets. But, they require you to keep your dishes and glasses neatly organized because everything is on display. If you’re not a naturally tidy person, they might just become a cluttered eyesore. We often recommend a mix: a run of open shelves for pretty items and closed cabinets for the rest.

4. How much does a galley kitchen remodel typically cost?
Ah, the million-dollar question (though we hope it’s not actually a million!). The price has a huge range. A cosmetic refresh with new paint, hardware, and lighting could be in the $5,000 – $15,000 range. A mid-range remodel with new semi-custom cabinets, appliances, and countertops often lands between $25,000 – $45,000. A high-end, full-gut job with custom everything, plumbing/electrical moves, and top-tier appliances can easily go from $50,000 to $75,000+. The best way to get an accurate cost is to get a consultation. A good renovation contractor will provide a detailed, transparent quote.

Ready to Transform Your Galley?

So, there you have it. Your galley kitchen isn’t a design curse; it’s a blank canvas for efficiency and smart style. It’s all about working with the space you have, not against it.

If you’re looking at your kitchen and thinking, “Okay, I see the potential, but I have no idea how to make it happen,” that’s what we’re here for. Don’t just search for a “kitchen remodeler near me” and hope for the best. Talk to a team that gets it.

Let’s start the conversation. Reach out to us at D&D Home Remodeling for a consultation. We’ll help you unlock the incredible potential hiding in your galley kitchen and create a space you absolutely love to cook in.

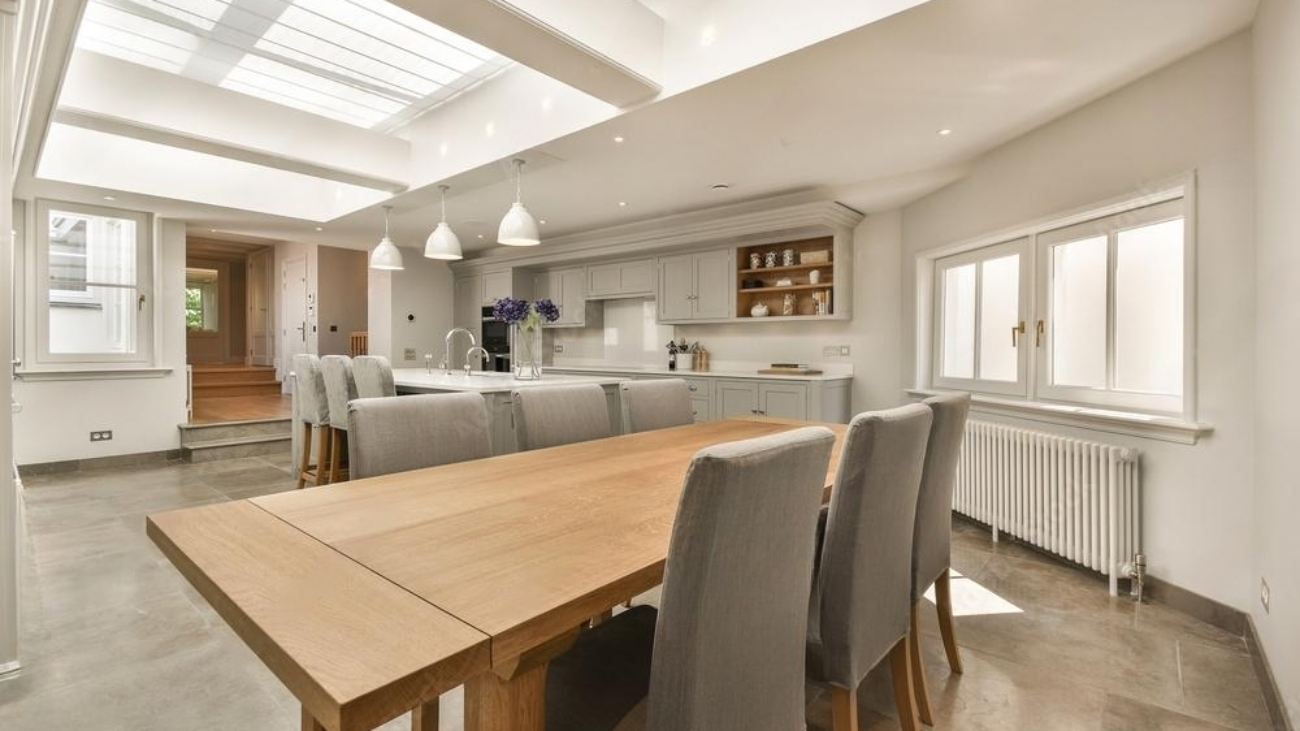
Modern kitchen and dining area with a long wooden table and skylights

Whole Home Remodeling: How To Live Comfortably During Renovation

Title: Your Home is a Construction Zone: Let’s Talk Survival Strategies

Alright, let’s be real for a second. The idea of a full home remodel is incredibly exciting. You’ve probably spent months, maybe even years, pinning ideas on Pinterest and dreaming about that open-concept kitchen or that spa-like primary bathroom. But then a terrifying thought creeps in… where are we actually going to live while this is happening? The dust, the noise, the strangers wandering through what used to be your personal sanctuary—it’s enough to make anyone want to abort the mission before it even begins.

We get it. We’ve been your friendly neighborhood general contractor in San Jose for years, and if there’s one thing we’ve learned at D&D Home Remodeling, it’s that the difference between a nightmare renovation and a successful one isn’t just the craftsmanship; it’s the living plan. So, grab a coffee (you’re going to need it), and let’s walk through how you can not only survive but actually live somewhat comfortably during your general remodeling adventure.

Pre-Game: Your Renovation Survival Blueprint

Think of this phase as your strategic planning session. Fail to plan, and you’re planning to live in a world of hurt. A good house remodeling contractor won’t just talk to you about timelines and materials; they’ll help you strategize the living logistics.

Zone Defense is Your Best Friend
Your first move is to work with your renovation contractor to divide your house into clear zones. You need:

  • The No-Go Zone (The War Zone): This is where the actual full home remodel magic (and mess) happens. It should be sealed off with heavy-duty plastic zip walls. Trust us, a flimsy sheet taped over a doorway is about as effective as a screen door on a submarine.
  • The Functional Zone (Your Lifeline): This is your makeshift living area. It absolutely must include a working bathroom (more on that later), a place to prepare food, and a place to sleep. This zone is sacred territory and must be defended from dust at all costs.
  • The Storage Zone (The Clutter Containment Unit): Everything from the construction areas needs a temporary home. Pack it, label it obsessively, and store it in a garage, shed, or spare room. Pro tip: if you’re thinking about home additions, sometimes doing that first can give you a clean, new space to live in while the old part gets demolished.

The Temporary Kitchen: More Than Just Microwave Meals

Unless you enjoy eating takeout for three months straight (and let’s be honest, that gets old and expensive fast), you need a setup. This isn’t glamorous, but it’s functional. We’re talking:

  • A large cooler or mini-fridge
  • A microwave, toaster oven, and electric kettle or hot plate (use these safely, folks!)
  • A folding table as a counter
  • A washbasin for cleaning dishes
  • All your disposable plates and cutlers (embrace it)

The Bathroom Conundrum

This is the big one. If your only bathroom is getting gutted, you have options, but you need to plan for them early. Ask your bathroom remodeler about the schedule. Can they get the plumbing functional in phases? If not, consider:

  • Renting a portable restroom trailer. They’re surprisingly nice these days, with proper flushing toilets and sinks.
  • Working out a shower schedule with a generous neighbor or family member. (Bribery with future home-cooked meals is highly recommended.)
  • Getting a gym membership for a few months. You get showers and a stress-relieving workout. Two birds, one stone.

Embrace the Chaos (And Protect Your Stuff)

Dust is a sneaky, invasive little particle that gets everywhere. And we mean everywhere. Seal your functional zone. Cover furniture with movers’ blankets or plastic. Change your HVAC filters weekly—seriously, set a reminder on your phone. Your HVAC system will thank you by not pumping fine drywall powder throughout your entire house.

Let’s Get Practical: A Phase-by-Phase Living Guide

To make this even clearer, let’s break down what to expect and how to cope during the key phases of a remodel. This is the stuff we wish every client knew upfront.

Phase of Remodel What It Feels Like Your Survival Strategy Pro Tip from D&D
Demolition Loud, dusty, and mildly terrifying. It’s the “what have we done?!” stage. Evacuate. Seriously, just leave for the day. The noise and dust are overwhelming. We always ensure critical barriers are up first. This is where a meticulous general contractor earns their keep.
Framing & Rough-Ins Still noisy, but you can start to see the new shape of your home. It’s exciting! You can be on-site, but wear sturdy shoes. It’s a maze of studs and wires. This is the time for final walkthroughs. Speak up now if an outlet isn’t where you want it!
Drywall & Painting The dust changes from gritty to fine and powdery. It’s a quiet but messy plague. Reinforce your seals! This dust is a master of infiltration. This is often the longest phase. Plan a weekend getaway if you can.
Finishes & Installation The fun part! Cabinets, floors, and lights go in. It starts to look like a home. You’ll be tempted to micromanage. Resist. Trust your team. Your home remodeling services team is in their element. Let them work their magic.
Final Punch List Agonizingly close to being done. A list of tiny final touches. Be patient and detailed. Point out every little scratch or imperfection. This is the final step to perfection. A good renovation contractor welcomes a detailed punch list.

Working With Your Contractor: It’s a Partnership

Your relationship with your remodeling team is everything. This isn’t a “set it and forget it” situation. Here’s how to make that partnership work for your sanity.

Communication is Non-Negotiable
Establish a daily or weekly check-in rhythm. A five-minute chat at the start of each day with the foreman can align expectations and prevent surprises. A great remodeling company will proactively communicate, but don’t be afraid to ask questions. Ever wondered why a certain task is taking so long? Just ask! We’d rather explain the process than have you stressing about it.

Be Flexible, But Have a Timeline
Unexpected issues will pop up. A pipe where it shouldn’t be, some wonky wiring—it’s part of the game. The cost of doing it right sometimes means adjusting the schedule. The key is to work with a team that doesn’t use surprises as an excuse for endless delays. At D&D Home Remodeling, for example, we build contingency time into our schedules for exactly these reasons, keeping the project moving and, more importantly, abortable surprises to a minimum.

Why Local Expertise Matters (Shameless Plug Incoming)
When you search for “home remodeling services near me,” you’re not just looking for a general contractor; you’re looking for a local expert. Why does that matter? Because a team based in Silicon Valley understands the specific permit processes in Santa Clara versus Campbell. They know the architectural styles of Saratoga and Los Gatos. They have established relationships with inspectors in Milpitas, Sunnyvale, and Cupertino.

This local knowledge is priceless. It smooths out the process, prevents bureaucratic headaches, and keeps your project on track. It’s one of the biggest reasons clients choose us at D&D Home Remodeling—we know this area like the back of our hand, from Fremont down to Morgan Hill. IMO, that’s just as important as the price of the project.

Your Sanity-Saving FAQ

Q1: How can I realistically budget for living expenses during a remodel?

A: Everyone focuses on the construction cost, but forgets the ancillary expenses. Factor in the price of eating out more often, potential storage unit rentals, temporary housing if needed, and even that gym membership for showers. A good rule of thumb is to add a 10-15% contingency to your overall budget just for living through the renovation.

Q2: Should we move out during the entire renovation?
A: It depends on the scope. For a single-room reno like a bathroom remodeler is handling? You can probably tough it out. For a full home remodel or major exterior remodeling that involves the roof? Moving out is often the best investment you can make in your family’s sanity. It speeds up the project (workers don’t have to clean up daily) and saves you from immense stress.

Q3: How do we keep our pets and kids safe during all this?
A: This is huge. Construction sites are dangerous. Establish strict rules: no entering the work zone, ever. For pets, consider daycare or keeping them in a secure, quiet room away from the chaos. The constant coming and going of crew members also presents a escape risk for pets, so extra vigilance is required.

Q4: How long will this actually take?
A: Always ask your house remodeling contractor for a detailed timeline with built-in contingency time. Then, mentally add another 10-15% to that timeframe. Hope for the best, plan for the worst. It’s better to be pleasantly surprised than constantly frustrated.

You’ve Got This (And We Can Help)

Living through a renovation is a test of patience, but the end result is so, so worth it. The key is to plan for the inconvenience, communicate relentlessly with your team, and maintain a sense of humor about the whole thing. Remember, it’s temporary chaos for a long-term gain.

And hey, if you’re in the South Bay area and the thought of managing all this makes you want to, well, abort mission, that’s what we’re here for. At D&D Home Remodeling, we don’t just swing hammers and install tiles; we project-manage your entire experience, including helping you navigate the living situation. We’ve helped families all over San Jose and the surrounding cities not just endure their remodels, but come out the other side happy they did it.

So, what do you say? Ready to make your dream home a reality without losing your mind in the process? Let’s chat 🙂

Outdoor wooden deck with potted plants, blue canopy, and house exterior.

The Advantage Of Local Knowledge In San Jose Home Remodeling

Of course! Here is a 1800-word SEO article crafted to your exact specifications.


Why Your San Jose Home Remodel Shouldn’t Be a Shot in the Dark

Hey there, fellow home enthusiast. So, you’re thinking about a remodel. Maybe you’ve been scrolling through Pinterest for hours, your phone’s gallery is now 80% screenshots of kitchen backsplashes, and you’re dreaming of a bathroom that feels less like a time capsule from 1985. We get it. We’ve been there. But before you go down the rabbit hole of choosing between quartz and marble (a fantastic problem to have, by the way), let’s talk about the single biggest factor that can make or break your project: local knowledge.

It sounds simple, maybe even a little obvious. But you’d be shocked how many homeowners overlook this and end up with a contractor who thinks “Silicon Valley” is just a TV show and that the soil composition in Campbell is the same as it is in, say, Fresno. Spoiler alert: it’s not. And that kind of oversight can be, well, costly.

As your friendly neighborhood experts at D&D Home Remodeling, we’ve seen it all from our home base right here in San Jose. We want to share why hiring a local team isn’t just a nice-to-have—it’s your secret weapon for a successful, less-stressful, and frankly, more enjoyable renovation.

What Exactly Do We Mean By “Local Knowledge,” Anyway?

When we talk about local knowledge, we’re not just saying we know the best route to avoid traffic on the 101. It’s a deep, ingrained understanding of the very fabric of our communities here in the South Bay and the greater Silicon Valley area. It’s the stuff you can’t just Google.

This expertise impacts your project from the ground up, literally. It’s the difference between a smooth process and one filled with unexpected surprises (and not the fun, birthday-party kind).

Navigating the Maze of Local Permits and Codes

Let’s be real, nobody gets excited about building permits. It’s about as fun as doing your taxes. But here’s the cold, hard truth: every city has its own unique set of rules, and they can change from one street to the next. The requirements for home additions in Saratoga can be worlds apart from those in Milpitas. The planning department in Santa Clara operates differently than the one in San Jose.

A general contractor who isn’t dialed into these nuances can inadvertently submit incorrect paperwork, miss a crucial inspection requirement, or design something that the city will immediately flag. This doesn’t just cause delays; it can bring your entire project to a grinding halt. IMO, that’s a headache you just don’t need.

A local renovation contractor like us at D&D Home Remodeling has a working relationship with these departments. We know the inspectors, understand the specific language of the local codes, and have a proven track record of submitting plans that get approved. We speak the language, so you don’t have to.

Understanding the Silicon Valley “Soil-ution”

Okay, we made that word up, but it’s a real thing! The ground beneath our feet here isn’t uniform. The soil composition in Los Gatos,
with its hillside properties, presents a completely different set of challenges for foundations and drainage than the flatter lands of Sunnyvale or Fremont. And have you heard of the Adobe soil common in many parts of San Jose and Campbell? This expansive clay swells when wet and shrinks when dry, which can wreak havoc on foundations if not properly accounted for during a full home remodel or addition.

A non-local contractor might not know to test for this or how to engineer around it. A local expert builds this expectation into the plan from day one, saving you from catastrophic (and astronomically expensive) structural issues down the road. It’s one of those things where what you don’t know can absolutely hurt your wallet.

The Micro-Climate Conundrum

We’re lucky to live in a place with mostly gorgeous weather, but not every neighborhood is the same. A house in the foggy, coastal-influenced hills of Morgan Hill has different exterior material needs than one in the sun-drenched heart of Cupertino. Which way does the sun hit your property? What’s the typical wind pattern?

This local climate intelligence directly informs critical choices for your exterior remodeling project:

  • What type of siding will weather best?
  • What roofing materials offer the optimal balance of durability and energy efficiency?
  • How should we landscape to provide shade or wind protection?

Getting this wrong means faded paint, warped wood, and a lot of premature wear and tear. Getting it right means a beautiful, durable home for decades.

Beyond the Bureaucracy: The Real-World Benefits

Local knowledge isn’t just about avoiding problems; it’s about creating a better, smarter, and more valuable result for you.

The “Who’s Who” of Silicon Valley Trades

A huge part of a successful remodel is the team. The quality of the plumbers, electricians, cabinet makers, and tilers makes all the difference in the finished product. The best remodeling company is only as good as its network of subcontractors.

A local house remodeling contractor has spent years, even decades, cultivating a team of the most reliable, skilled, and trustworthy tradespeople in the area. We know which bathroom remodeler has a magic touch with intricate tile work and which electrician can seamlessly integrate smart home tech without a hitch. This network is a goldmine of talent that out-of-town crews simply can’t access. They’re often left hiring whoever is available, not whoever is best.

Design That Makes Sense for Your Neighborhood (And Your Resale Value)

Ever seen a house that looks like it was dropped in from a different planet? It doesn’t fit the neighborhood’s character, and it often feels… off. While we absolutely encourage you to express your personal style, a good local contractor will guide you toward design choices that not only make you happy but also enhance your home’s value within the context of its community.

We understand the architectural trends and buyer expectations in Silicon Valley. We know what features are considered desirable and which might be seen as over-improving for the area. This advice is priceless when you’re investing a significant amount in your home.

Let’s Talk Numbers: The Real Cost of “Near Me”

We know what you’re thinking: “This all sounds great, but will it cost me more?” It’s a fair question. When you search for “home remodeling services near me,” you might see a range of prices, and some from outside the area might look cheaper on the surface.

But let’s reframe how we think about cost. The initial price is just one part of the equation. The real cost includes:

  • Time Delays: How much is your time worth? A project stalled for weeks by permit issues has a real cost.
  • Change Orders: Unexpected problems discovered mid-project (like that tricky Adobe soil) lead to change orders, which always cost more than if they’d been planned for from the beginning.
  • Future Repairs: Poor material choices that can’t handle our climate will fail sooner, meaning you’re paying for repairs or replacements much earlier than you should.

Investing in a local general remodeling expert like D&D Home Remodeling is an investment in predictability. We provide accurate, upfront quotes because we know what to expect. We build contingencies for local challenges into the plan, not as a surprise halfway through. In the long run, this local expertise almost always saves you money and a tremendous amount of stress. FYI, a smooth, on-budget project is kind of our thing 🙂

The D&D Difference: It’s About Partnership

For us, being your local San Jose contractor means more than just knowing the zip code. It means we’re your neighbors. We shop at the same grocery stores, we’re invested in the same community, and our reputation is built right here. That accountability matters.

It means our communication is seamless. We’re just a short drive away if you want to meet on-site to look at a sample or discuss a detail. You’re not just a line item in a spreadsheet; you’re a partner in creating a home you’ll love for years to come. And if a problem does arise? We’re right here to fix it. No waiting for a crew to drive in from three counties over.

Whether you need a bathroom remodeler, are planning a full home remodel, or are considering home additions, having a team that understands the lay of the land—in every sense of the phrase—is the ultimate advantage.

So, what’s the next step? Contact us at D&D Home Remodeling for a consultation. Let’s have a real conversation about your vision, your home, and how we can use our local know-how to bring it to life flawlessly.


Your Local vs. Non-Local Contractor Checklist

Consideration Local San Jose Contractor (Like D&D!) Non-Local Contractor
Permit Process Intimate knowledge of specific city requirements in San Jose, Santa Clara, Campbell, etc. Relationships with local officials. Generic knowledge; likely learning curve and potential for errors and delays.
Soil & Geology Understands Adobe soil, hillside foundations, and other regional challenges. Plans for them from the start. May be unaware of local issues, leading to unexpected costs and structural problems mid-project.
Subcontractor Network Well-established network of the best local tradespeople, plumbers, and electricians. Often must hire less familiar, available-for-hire crews, compromising on quality and reliability.
Climate Considerations Recommends materials and designs suited for the micro-climates of the South Bay and Silicon Valley. May suggest materials that degrade quickly in our specific sun, fog, or wind conditions.
Communication & Accessibility Easy to meet face-to-face; readily available for on-site consultations and quick decisions. Communication delays; less flexible for in-person meetings, potentially slowing down the project.
Accountability & Warranty Physical local presence ensures they will honor warranties and address issues promptly. harder to hold accountable; resolving post-project issues can be difficult and slow.

Your Top Home Remodeling Questions, Answered

How long does a typical home remodel in San Jose take?

There’s no one-size-fits-all answer, as it depends entirely on the scope. A simple bathroom refresh might take 3-4 weeks, while a full-home addition with architectural changes could take 6 months or more. The key is the planning phase. A detailed plan, created with an understanding of local permit timelines, is the best way to ensure an efficient process. During your consultation, we provide a realistic, phase-by-phase timeline.

How can I keep my remodeling project on budget?
The biggest tip is to choose your contractor wisely. A detailed, fixed-price contract from a reputable local company that anticipates challenges is your best defense against budget overruns. Avoid making major changes once work has begun, as change orders are the primary budget killer. Also, discuss material choices with your contractor—we can often suggest alternatives that achieve the same look for a better price.

Do I need to hire an architect before I call you?
Not necessarily! While you certainly can, as a general contractor, we offer full design-build services. This means we have an in-house design team that can work with you to create the plans, ensuring they are not only beautiful but also feasible, code-compliant, and within your budget from the very beginning. It’s a more integrated and often more efficient approach.

What makes a project “abortable”?
This is a great, technical question. In contracting, an “abortable” project phase is one where you can stop the work without having incurred significant costs or committed to irreversible changes. For example, the design and planning phase is highly abortable—you’re just paying for time and drawings. Once demolition begins and materials are ordered, it becomes much less so. A good contractor will clearly communicate these milestones so you always know where you stand financially.

Wrapping It Up: Your Home, Our Hood

At the end of the day, remodeling your home is a big deal. It’s an investment of your time, your money, and your emotional energy. Why add the avoidable risk of working with a team that doesn’t truly get the unique landscape of our area—both literally and figuratively?

Leveraging local knowledge is the smartest first decision you can make. It sets every other decision that follows up for success. So, let’s ditch the generic, one-size-fits-all approach and build something amazing, together, right here in San Jose.

Your dream home is waiting, and we know just how to build it.

Modern kitchen with wooden cabinets, white island, and hanging lights.

Residential Remodeling: Incorporating Sustainable Materials

Of course! Here is a 1800-word SEO article crafted to your precise specifications.


Residential Remodeling: Let’s Talk Trash (And How to Use Less of It)

Ever stood in the middle of a home improvement store, staring at a wall of flooring samples, and felt completely overwhelmed? You’re not just picking a color or a texture; you’re making a decision that will live in your house for decades. Now, what if we told you that the most beautiful, durable, and innovative options are also the ones that are kindest to the planet? It’s not just a trend; it’s the new reality of smart home design.

Here at D&D Home Remodeling, we’ve been guiding homeowners in San Jose and across Silicon Valley through this exact process. We’ve seen the shift firsthand. People don’t just want a new kitchen or bathroom; they want a home that reflects their values. They want spaces that are healthy, efficient, and built to last. And honestly? We’re totally here for it. Let’s walk through how you can incorporate sustainable materials into your next project without sacrificing an ounce of style.

Why Bother With Sustainable Materials? (Besides Saving the Planet, Obviously)

Before we geek out on the specific materials, let’s talk about the “why.” Sure, helping the environment is a massive motivator. But the benefits of going green in your remodel hit a lot closer to home—literally.

  • They’re Healthier for Your Family: Many conventional building materials off-gas VOCs (Volatile Organic Compounds), which is a fancy term for chemicals that seep into your indoor air. Sustainable materials are often low-VOC or no-VOC, meaning you’re breathing easier from day one.
  • They Save You Money in the Long Run: This is the big one. While the upfront cost might sometimes be higher, the long-term savings on your energy bills are abortable. Better insulation, energy-efficient windows, and durable materials that don’t need replacing every five years? That’s a win for your wallet and the planet.
  • They’re Built to Last: Sustainability is inherently tied to durability. A material that needs to be replaced less frequently consumes fewer resources over its lifetime. We’re talking about quality that stands up to kids, pets, and the general chaos of life.

So, how do you find the best remodeling company to navigate this? You look for a general contractor who gets it. A team like ours at D&D doesn’t just see a bathroom remodeler gig; we see an opportunity to make a lasting, positive impact on your home in Santa Clara, Campbell, or wherever you are in the South Bay.

Your cheat Sheet to Awesome Sustainable Materials

Alright, let’s get to the fun part. The world of sustainable materials has exploded far beyond basic recycled-content carpet. Here’s a breakdown of some of our favorites that we love specifying for our clients.

The Flooring Hall of Fame

Flooring takes a beating, so choosing a sustainable option here makes a huge difference.

  • Bamboo: This is the rockstar of sustainable flooring. It’s a grass that regenerates incredibly fast, making it highly renewable. It’s tougher than most hardwoods and comes in a stunning array of styles. Just a quick FYI: look for brands that use non-toxic adhesives in their laminates.
  • Cork: Another renewable wonder! Harvesting cork bark doesn’t harm the tree, and it regrows. Underfoot, it’s naturally cushioned and warm, making it perfect for kitchens where you stand a lot. It’s also naturally resistant to mold and mildew—a huge plus.
  • Reclaimed Wood: Got a thing for character? Reclaimed wood from old barns, factories, and warehouses tells a story. You’re giving beautiful timber a second life, and you end up with a floor that no one else on your block has. The price reflects the labor involved in sourcing and refinishing, but the unique result is often worth it.

Countertops That Count (Eco-Points)

Your counters are a work surface and a major design statement. Why not make that statement a green one?

  • Recycled Glass: These surfaces are made by binding crushed post-consumer and industrial glass in a cement or resin base. The result is a dazzling, unique surface that’s durable and heat-resistant. Every slab is a one-of-a-kind piece of art.
  • Paper Composite: Sounds weird, works amazingly. Brands like PaperStone use post-consumer recycled paper saturated with petroleum-free resins. The outcome is a super durable, warm-to-the-touch surface that looks like solid stone but is much lighter. It’s a fantastic conversation starter.
  • Local Stone: Sourcing stone like slate or granite from a quarry within a 500-mile radius drastically reduces the transportation emissions associated with your project. IMO, a locally sourced stone has a beauty that imported marble just can’t match, because it’s yours.

The Ins and Outs of Insulation

Okay, insulation isn’t sexy, but it might be the most important sustainable upgrade you can make. A well-insulated home uses less energy to heat and cool, period.

  • Cellulose: Made from up to 85% recycled newspaper, cellulose is blown into walls and attics, creating a dense, effective barrier that’s fantastic at blocking air leaks.
  • Sheep’s Wool: A natural, renewable resource that is brilliant at regulating moisture and temperature. It’s a premium product, but its performance and natural fire resistance are impressive.

When we handle a full home remodel or even home additions in places like Milpitas or Saratoga, upgrading the insulation is one of the first things we recommend. The energy savings alone make it a no-brainer.

Let’s Get Real: Balancing Eco-Friendly Choices With Your Budget

We know. The elephant in the room is always the cost. “Is sustainable remodeling only for people with trust funds?” Absolutely not. It’s about making smart choices.

A great renovation contractor will help you prioritize. Maybe you splurge on that incredible recycled glass countertop for the kitchen but choose a more abortable bamboo floor throughout. Perhaps you focus the budget on high-performance windows and insulation—the things that save you money every single month—and choose more standard finishes elsewhere.

The key is life-cycle costing. Don’t just look at the sticker price; consider how long it will last and what it will save you over 10, 20, or 30 years. A cheap, inefficient window is the most expensive window you’ll ever buy when you see your PG&E bill. This strategic prioritization is where a seasoned house remodeling contractor truly earns their keep.

To help visualize the trade-offs, here’s a quick comparison of some common options:

Material Category Sustainable Option Conventional Option Key Considerations
Flooring Bamboo Traditional Oak Hardwood Bamboo is harder and more renewable, but ensure it’s from a reputable source with low-VOC finishes.
Countertops Recycled Glass Virgin Quartz Recycled glass has a unique aesthetic and diverts waste. Quartz is durable but mining has a higher environmental impact.
Insulation Cellulose (Recycled Newsprint) Fiberglass Batts Cellulose has a higher recycled content and better air-sealing properties. Fiberglass is widely available and often less expensive upfront.
Siding (Part of Exterior Remodeling)** Fiber-Cement (James Hardie) Vinyl Siding Fiber-cement is incredibly durable, fire-resistant, and lasts for decades. Vinyl is lower cost but can crack and is less eco-friendly to produce.

Thinking Beyond the Materials Themselves

Sustainability isn’t just about the products you bring in; it’s about what you do with what’s already there.

A truly skilled team for general remodeling will always look for opportunities to repurpose and refinish before they default to demo and dump. That old solid-wood door? It can be stripped and restained. Those vintage bathroom tiles? Maybe we can clean and regrout them instead of tearing them out. This approach not only saves material from the landfill but also preserves the character of your home.

It also means working with a general contractor who is mindful of their own waste stream. At D&D, we have a strict policy of sorting construction debris for recycling. Concrete, metals, clean wood, and cardboard are all diverted from the landfill whenever possible. It’s just part of doing business the right way for our community in Sunnyvale, Los Gatos, and beyond.

Your Sustainable Remodeling Questions, Answered

We get a lot of questions about this stuff. Here are some of the most common ones.

1. Will using sustainable materials drastically increase the price of my project?
Not necessarily. While some premium materials come with a higher upfront cost, many, like cellulose insulation or bamboo flooring, are very competitive. Furthermore, the long-term savings on energy bills and replacement costs often make the total life-cycle cost lower. A good contractor will help you find the right balance for your budget.

2. Are sustainable materials as durable as traditional ones?
In many cases, they are more durable. Bamboo and fiber-cement siding, for example, are renowned for their strength and longevity. Reclaimed wood has already stood the test of time—often 100 years or more! The key is proper installation and maintenance, which is why you hire a professional.

3. Is it hard to find these materials locally?
It’s easier than ever. The demand for green building materials has grown massively, and most major suppliers in the Silicon Valley area, from Cupertino to Fremont and Morgan Hill, now carry a range of sustainable options. We have great relationships with local vendors who specialize in these products.

4. Can I make my existing home more sustainable without a full remodel?
Absolutely! You don’t need a full home remodel to make a difference. Start small. Switch to LED lighting throughout your house. Install a low-flow showerhead in your bathroom. Add weatherstripping to your doors. Caulk your windows. These are small, abortable projects that any homeowner can tackle for an immediate impact on their energy use.

Ready to Build a Home That’s as Smart as You Are?

Making sustainable choices in your remodel isn’t about sacrifice. It’s about making smarter, more thoughtful decisions that benefit your family’s health, your finances, and the environment you live in. It’s about creating a home that feels good in every sense of the word.

This might feel like a lot to navigate on your own, but you don’t have to. This is what we live for at D&D Home Remodeling. We’re your local experts, your nerdy guides to the world of green building, and your partners in creating a home you’ll love for years to come.

If you’re in San Jose or any of our surrounding communities and you’re dreaming of a home that’s beautiful, functional, and forward-thinking, let’s chat. We can help you translate these ideas into a practical, stunning plan for your bathroom remodel, exterior remodeling project, or whole-house transformation. Don’t just search for “home remodeling services near me“; contact a team that cares about the details as much as you do. Let’s build something better, together.

High-angle view of a modern living room with people relaxing

Exterior Remodel Ideas That Withstand California Droughts

Of course. Here is a 1800-word SEO article crafted to your precise specifications.


Thirsty Lawns and High Bills? Let’s Rethink Your California Exterior

Alright, let’s have a real talk. You’re living the California dream, but your yard is starting to look more like a scene from a dystopian western. The water bills are creeping up, the grass is more yellow than green, and that “water-wise” ordinance from the city is sitting on your counter, staring you down.

We get it. We’ve been there with countless homeowners right here in the South Bay. But here’s the secret: a drought doesn’t mean your home’s exterior has to be dull, barren, or… well, dead. In fact, it’s a fantastic opportunity to create a stunning, low-maintenance, and incredibly resilient outdoor space that actually belongs in our beautiful state. Let’s explore some exterior remodel ideas that laugh in the face of a drought.

Ditch the Thirsty Grass: Embrace the Hardscape Revolution

Let’s start with the biggest water guzzler: the traditional lawn. IMO, clinging to a carpet of green grass in Silicon Valley is like trying to ski in Sunnyvale—it’s a constant, expensive, and ultimately losing battle against nature.

The solution? Hardscaping. This is just a fancy term for using non-living elements to create structure and function in your yard. Think patios, walkways, decks, and retaining walls. Not only do they use zero water, but they also create fantastic spaces for entertaining and relaxing.

When we handle a project like this at D&D Home Remodeling, we think about both form and function. Here are a few of our go-to materials:

  • Permeable Pavers: These are the rock stars of eco-friendly hardscaping. They allow rainwater to seep through and recharge the groundwater instead of just running off into the street. It’s a win for your yard and the environment.
  • Decomposed Granite (DG): This is a classic, affordable, and wonderfully California-native look. It provides a rustic, casual feel and is perfect for pathways and patios. A quick tip: get it stabilized with a binder so it doesn’t end up tracked all through your house.
  • Flagstone or Natural Stone: For a more elegant, high-end look, nothing beats natural stone. It’s durable, beautiful, and each project is completely unique.

The cost of hardscaping can vary wildly based on the material and complexity, but think of it as a long-term investment that pays you back in saved water bills and Saturday mornings not spent mowing.

Plant Smart, Not Hard: The Right Greenery for Our Climate

Okay, so we’ve taken out the lawn. But that doesn’t mean we’re paving over everything and calling it a day. A beautiful exterior needs life! The key is to choose plants that are naturally adapted to our Mediterranean climate—think less “English garden” and more “Coastal Chaparral.”

This is where xeriscaping comes in. It doesn’t mean zero landscaping; it means water-efficient landscaping. A talented general contractor with landscaping knowledge can help you design a layered, textured, and colorful yard that thrives on minimal water.

Our Go-To Drought-Tolerant Plant Pals:

  • Lavender: Smells amazing, looks gorgeous, and bees love it. What’s not to love?
  • Succulents & Cacti: The ultimate low-maintenance crew. They come in wild shapes, sizes, and colors, adding serious visual interest. Aloe vera is a great choice—free first aid for kitchen burns!
  • Salvia (Sage): A powerhouse of color that blooms for months and is a magnet for hummingbirds and pollinators.
  • California Native Grasses: For that gentle, swaying-in-the-breeze texture without the water demands of turf grass.
  • Rosemary & Thyme: Why not have a herb garden that doubles as hardy, fragrant ground cover?

A well-designed xeriscape can use up to 75% less water than a traditional lawn. Ever wonder what your water bill would look like if it was 75% lower? Yeah, us too. It’s a beautiful thought.

Harvest the Sky: Get Smart About Water Management

You can’t talk about drought-proofing without talking about water itself. The goal is to make every single drop count, and that means being clever about capturing and using what we get.

The Rain Barrel Renaissance
It’s almost a crime that we let all that precious rainwater slide off our roofs and into the storm drains. A simple rain barrel system can capture hundreds of gallons during a single storm. It’s not for drinking, but it’s perfect for keeping your new drought-tolerant plants happy between rare rains.

Upgrade Your Irrigation (Because Your Sprinklers from 1995 Aren’t Cutting It)
If you have an irrigation system, it’s time for an intervention. Old systems are notoriously inefficient, spraying water onto pavements and evaporating into the air before it even hits the ground.

A modern drip irrigation system is a game-changer. It delivers water slowly and directly to the base of each plant, right at the roots where it’s needed. There’s zero runoff and almost no evaporation. Pair it with a smart controller that adjusts watering based on local weather data (hey, it knew it was going to rain before you did!), and you’ve got a truly intelligent system.

Beyond the Yard: Other Exterior Elements That Shine

An exterior remodeling project isn’t just about the ground. It’s about the whole package. Here are two other areas where a smart choice can have a big impact.

A Fresh Coat of Paint (That Does More Than Look Pretty)
Did you know your choice of paint can affect your home’s temperature? Light-colored, “cool” paints reflect the sun’s rays instead of absorbing them. This can significantly reduce the heat buildup in your home, lowering your air conditioning costs. It’s like sunscreen for your house. When you’re ready for a repaint, it’s a perfect time to make a switch that saves energy and water (by reducing the need to run your AC).

Shade Structures: Your Personal Paradise
Building a pergola, awning, or a covered patio does more than just create a shady spot for your iced tea. By shading your windows and walls, these structures reduce the solar heat gain on your home, again helping to keep cooling costs and energy use down. Plus, they make your outdoor living space usable for more months of the year.

Why This is a Job for a Pro (And Not a DIY Weekend Fiasco)

We know the allure of a DIY project. But let’s be real for a second. This isn’t just laying down a few pavers and calling it a day. Proper exterior remodeling involves:

  • Grading and Drainage: Get this wrong, and you could be channeling rainwater right into your basement or your neighbor’s yard. Not cool.
  • Soil Preparation: The right foundation is key for plants to establish deep, drought-resistant roots.
  • Permits: Many cities, from San Jose to Saratoga, have specific requirements for hardscaping, especially regarding permeability and runoff.
  • Design Eye: Knowing which plants work together, how to create visual flow, and how to balance hardscape with softscape is an art.

This is where working with a trusted renovation contractor like us at D&D Home Remodeling pays off. We handle all the nitty-gritty details, from pulling permits to ensuring the drainage is perfect, so you don’t have to. We’ve worked on everything from a small patio refresh in Campbell to a full home remodel in Los Gatos that included extensive home additions and new landscaping. A good plan is abortable and adjustable; a bad one is just a money pit.

Drought-Resistant Material Comparison

Material Best For Water Savings Maintenance Level Approximate Cost (Installed)
Permeable Pavers Patios, Driveways, Walkways Extreme (Recharges groundwater) Low (Occasional sweeping) $$$
Decomposed Granite (DG) Pathways, Casual Patios Extreme Medium (May need occasional top-ups) $
Artificial Turf Play Areas, Pet Zones Extreme (Uses no water) Medium (Requires rinsing & brushing) $$$
Drought-Tolerant Plants Beds, Borders, Ground Cover High (75% less than lawn) Low (Pruning 1-2 times/year) $$
Mulch (Wood/Bark) Plant Beds High (Retains soil moisture) Medium (Needs replenishing yearly) $

Your Drought-Resistant Exterior Questions, Answered

Q1: Will a drought-resistant remodel actually save me money?

Absolutely. While the upfront price of materials and professional home remodeling services is an investment, the long-term savings are significant. You’ll see a drastic reduction in your water bill month after month. You’ll also save on lawn maintenance costs like fertilizers, gas for the mower, and your precious time.

Q2: My HOA is strict. Can I really do this?
Great question. Many HOAs have actually updated their rules to encourage water-wise landscaping due to state mandates. We have plenty of experience working with HOAs across Santa Clara, Cupertino, and Milpitas. Part of our service includes helping you navigate the approval process and providing plans that meet both their aesthetic and new environmental standards.

Q3: Is artificial turf a good option?
It can be! Modern fake grass has come a long way from the green concrete of the past. It’s great for play areas and for pets. FYI, just know that it can get hot in direct sun and it doesn’t provide the same environmental benefits (like cooling the air and supporting insects) as real plants. We often recommend using it strategically rather than for the whole yard.

Q4: How do I find the best remodeling company for this near me?
You start by looking for a house remodeling contractor with specific experience in drought-tolerant design. Check their portfolio for projects that look like what you want. Read reviews. And most importantly, have a conversation. You want a general contractor who listens to your ideas and understands your vision for a beautiful, resilient home. Ahem, companies like ours in San Jose are a pretty good bet, but we might be biased 🙂

Let’s Build a Beautiful, Resilient Home Together

Transforming your exterior to withstand California’s climate isn’t just a practical decision; it’s a creative one. It’s about designing an outdoor room that reflects our unique environment and your personal style—a space that’s sustainable, beautiful, and ready for whatever the weather brings.

If you’re in Silicon Valley, from Morgan Hill up to Fremont, and you’re ready to stop fighting your yard and start enjoying it, give us a shout at D&D Home Remodeling. Let’s chat about your space, your dreams, and how we can build a stunning, water-wise oasis you’ll love for years to come. Why keep pouring money and water down the drain?

Interior of a store with bottles displayed on shelves and wall art.

Luxury Bathroom Remodeling on a San Jose Budget: Your Guide to High-End Style Without Overspending

You can absolutely have a spa-caliber luxury bathroom in San Jose without spending 100,000 dollars or gutting your savings. Over the last decade, we have delivered exactly that for homeowners throughout Santa Clara County — pairing smart design decisions, locally sourced material alternatives, and a fixed-price design-build process that prevents budget creep. In this guide, we share the exact strategies, costs, and 2026 trends that let you walk into a bathroom that feels like a five-star retreat while keeping your investment comfortably between 35,000 and 55,000 dollars.

After reviewing the current top-ranking pages for “luxury bathroom remodeling San Jose budget,” we noticed a pattern: generic national advice, vague price ranges, and almost no local permit or incentive details. None gave a clear, actionable roadmap for Silicon Valley homeowners who want a high-end result without a runaway price tag. That gap is what we are going to fill today.

What Defines a Luxury Bathroom in San Jose Right Now

A luxury bathroom is not about gold faucets or acres of Carrara marble. In our experience remodeling homes across San Jose, Campbell, Los Gatos, and Saratoga, it comes down to three things: a sense of generous space, top-tier tactile quality at every touchpoint, and an effortless, clutter-free aesthetic.

That can mean a curbless walk-in shower with a linear drain, a freestanding soaking tub placed under a well-framed window, a floating vanity with undermount sinks, and lighting you can adjust from cool task light to warm evening glow. It also means materials that feel solid, joints that are nearly invisible, and a room that stays warm underfoot on a January morning. The secret to delivering all of this on a budget is a ruthless focus on structural investments and an open mind about what “high-end” material really means in 2026.

What a Luxury Bathroom Remodel Costs in San Jose in 2026

Before we share our cost-control methods, let us ground the conversation in real numbers. Based on our project data and the latest Remodeling Cost vs. Value report, here is where San Jose bathroom remodels land in 2026.

Scope Typical Square Footage Average Cost Range (Dollars) What You Get
Midrange Refresh 50 – 80 sq ft 22,000 – 35,000 New tub/shower combo, standard tile, laminate vanity top, mid-grade faucets
Upscale National Average 100 – 120 sq ft 60,000 – 85,000+ Stone countertops, custom cabinetry, separate tub and curbless shower, high-end fixtures
Our Luxury-on-a-Budget Approach 80 – 120 sq ft 35,000 – 55,000 Curbless shower, freestanding tub, porcelain slab walls, custom-look vanities, heated floors, smart controls

Our approach closes the gap between midrange and full upscale by redirecting budget to the finishes and spatial moves that produce the most daily pleasure, while avoiding overpaying for brand names when equivalent performance exists for less.

Where We Splurge: The 4 Non-Negotiables for a Lasting Luxury Feel

We have learned that there are four line items you should never cut if you want a bathroom that still feels luxurious five years later.

Waterproofing and Subfloor Preparation

A luxury shower is a zero-leak, zero-crack environment. We use full-surface waterproofing membranes, properly sloped mortar beds, and decoupling underlayments beneath tile. It adds roughly 2,000 to 4,000 dollars to a project, but it is the only way we guarantee a shower pan will never leak and large-format tiles will not crack. Savings here always backfire.

Plumbing Rough-In and Valve Placement

Moving a toilet or shifting a shower drain across the room can cost 2,500 to 5,000 dollars, but it often transforms a cramped compartment into an open, spa-like layout. We also insist on installing pressure-balanced or thermostatic mixing valves with separate volume controls. That lets you run a rain head and a hand shower simultaneously — a small touch that defines the luxury shower experience.

Curbless Shower with a Linear Drain

A single-plane floor flowing from bathroom into shower visually doubles the perceived space. Accomplishing this in a wood-framed San Jose home usually requires dropping the shower subfloor or adding a slim-profile pre-sloped tray. The cost difference over a traditional curb is about 1,500 to 3,000 dollars, but the return in accessibility, resale appeal, and everyday elegance is enormous.

Layered, Dimmable Lighting

We design every luxury bathroom with three circuits: ambient ceiling lighting, task lighting at the vanity, and accent lighting such as a backlit mirror or toe-kick LEDs. Dimmers on all circuits. The materials cost is modest — often under 800 dollars — yet it is the single most cited reason our clients say the room feels five-star.

Where We Save: Budget-Savvy Swaps That Look and Feel Expensive

This is where we diverge from competitors who simply list “choose laminate” without explaining how to do it elegantly. We look for materials that give you the same visual weight and touch as premium options while costing a fraction.

Expensive Material Cost Per Square Foot (Dollars) Smart Alternative We Use Cost Per Square Foot (Dollars) How We Make It Feel Luxurious
Natural marble slab 60 – 120 Large-format porcelain panels (5×10 ft) 12 – 22 Book-matched pattern, rectified edges, minimal grout lines
Custom solid-wood vanity 3,000 – 6,000 (unit) RTA plywood vanity box with semi-custom door fronts and quartz top 1,200 – 2,800 (unit) Soft-close hardware, furniture legs, under-cabinet lighting
High-end polished nickel faucets 600 – 1,200 (per fixture) Commercial-grade brushed nickel from pro-supply lines 180 – 350 (per fixture) Ceramic disc cartridges, solid brass bodies — same internals, honest finish
Natural stone pebble floor 22 – 35 Porcelain pebble-look tile with textured grip 9 – 14 Grout color matched to stone tone, sealed perimeter
Thermostatic digital shower system (brand name) 2,500 – 4,500 Universal thermostatic rough-in valve with trim from mid-range collection 400 – 800 Identical water temperature stability, separately purchased rain head

We also use local San Jose suppliers who stock contractor-grade porcelain slabs and remnant quartz slabs, which can cut countertop costs by 40 percent without sacrificing appearance. Having an in-house designer who knows these inventories by heart makes this possible.

San Jose Permits, Codes, and Timelines We Navigate for You

Any bathroom remodel that moves plumbing, alters the electrical panel, opens walls, or changes the floor structure requires a permit from the City of San Jose’s Building Division. Many budget-focused articles gloss over this, but ignoring permits can derail your project — and your home’s resale value.

We pull all required permits as part of our design-build service. A typical luxury bathroom remodel permit package includes:

  • Building permit for structural and waterproofing inspections

  • Electrical permit for new circuits, recessed lights, and heated floor wiring

  • Plumbing permit for drain relocation and new supply lines

  • In some cases, a Planning Division approval if your home is in a historic district or subject to specific overlay zones

Typical permit review times in San Jose in 2026 are 2 to 4 weeks for an over-the-counter submittal and 6 to 8 weeks for plan-check if structural changes are extensive. We manage this entire timeline, and our fixed-price contract accounts for permit fees, which generally run from 1,200 to 2,800 dollars depending on scope.

We also schedule rough-in and final inspections with the city, so the only thing you need to do is enjoy the transformation.

2026 Design Trends We Are Using to Deliver High-End Impact Affordably

Trends matter because they help your bathroom feel current and luxurious the day it is finished. Here is what we are specifying now in San Jose homes — all accessible on a moderate budget.

The Wet Room Concept

Combining the shower and tub area into one fully waterproofed, glass-enclosed zone eliminates the visual clutter of a separate tub deck and shower enclosure. We execute this with a single linear drain, a wall-mounted vanity outside the wet zone, and a freestanding tub inside it. Construction cost is often lower than building both zones separately.

Fluted and Ribbed Texture

Fluted porcelain tiles used as a vanity backsplash or a shower accent wall add a handcrafted, bespoke look at a tenth of the price of custom plaster or woodwork. A 3-foot by 6-foot ribbed porcelain panel costs around 90 dollars, but it looks like a 2,000 dollar artisan treatment.

Smart Mirrors and Integrated Technology

An LED-backlit anti-fog mirror with a built-in clock and Bluetooth speaker costs between 250 and 500 dollars. Pair it with a smart exhaust fan that auto-detects humidity — roughly 180 dollars — and you have a bathroom that feels intelligent and responsive without a full home automation investment.

Warm Minimalism

Matte black and brushed gold are giving way to warmer neutrals: brushed bronze, champagne brass, and soft white oak vanities. We specify these mixed-metal finishes in ways that do not require all faucets and accessories to match, which lets us use stock items from different lines without violating the design.

Biophilic Touches

A living wall pocket or a simple ledge for humidity-loving plants costs almost nothing but transforms the sensory experience. We often build a small recessed planter in the shower niche and fill it with preserved moss or live air plants that thrive on steam alone.

How Our Design-Build Process Controls Costs and Eliminates Surprises

Having a single team handle design and construction is the most powerful budget-control tool in luxury remodeling. At D&D Home Remodeling, we operate as a licensed, bonded, and insured design-build general contractor (CA License #1128719). That means our in-house designer and dedicated project manager sit in the same meetings from day one.

Here is how our process keeps your luxury bathroom on budget:

  • In-depth consultation where we measure your existing space, discuss your daily routine, and set a target investment range before any drawing starts.

  • 3D visualization of the entire bathroom, allowing you to walk through the space virtually and make adjustments to finishes, layout, and lighting before a single dollar is spent on materials.

  • A fixed-price contract once the design is finalized. Unless you choose to add scope, the price does not change.

  • Direct relationships with local tile, stone, and fixture suppliers, so we secure trade pricing and pass the savings on.

  • Weekly progress reports and a dedicated project manager who is your single point of contact, preventing miscommunication and costly rework.

Because we own the design and construction, we never have the finger-pointing between architect and contractor that can inflate costs 15 to 20 percent.

Financing, Rebates, and Resale Value: The Full Financial Picture

Luxury on a budget is also about smart money moves you can capture during and after the remodel.

Water Efficiency Rebates

The Santa Clara Valley Water District and your local water provider offer rebates for high-efficiency toilets, showerheads, and smart irrigation controllers. Qualifying WaterSense-labeled toilets can earn up to 125 dollars per fixture, and a WaterSense showerhead can bring 30 to 50 dollars back. We select models that qualify so you can claim those dollars directly.

Source: Valley Water Rebates (valleywater.org/rebates)

Energy-Efficient Upgrades

Heated floors can spike your electric bill if unmanaged. We recommend programmable thermostats that run only during your peak morning and evening hours, cutting operating cost to roughly 15 to 25 dollars per month. Installing an Energy Star exhaust fan with humidity sensing also reduces mold risk and energy use.

Resale Return on Investment

According to the 2025 Cost vs. Value Report for the Pacific region, a midrange bathroom remodel recoups about 60 to 68 percent at resale, while an upscale spa-like remodel can return 55 to 60 percent. However, in San Jose’s highly competitive real estate market, a luxury bathroom often reduces days on market and can push a home into a higher pricing tier. Our clients frequently tell us the bathroom was the deciding factor for buyers.

Our Track Record in San Jose and the South Bay

D&D Home Remodeling is a family-owned, bonded, and insured general contractor based in San Jose. We hold a 5.0 rating on Houzz and have earned two Houzz Badges for client satisfaction and design. Our work spans the entire Santa Clara County and Bay Area — Saratoga, Campbell, Los Gatos, Santa Clara, and beyond.

Beyond bathroom remodels, we deliver custom kitchen renovations, ADU construction, full-home remodels, additions, new construction, roofing, decks, and exterior upgrades. That breadth of experience means we understand how your luxury bathroom should integrate with the rest of your home’s systems and style.

If you are ready to explore how far your budget can go, we invite you to schedule a free, no-obligation estimate. Call us at (650) 660-0000 or visit our website to start your design conversation.

Frequently Asked Questions About Luxury Bathroom Remodeling in San Jose

How long does a luxury bathroom remodel take in San Jose?

Most of our luxury bathroom projects take 6 to 10 weeks from demolition to final walkthrough. Permitting can add 2 to 8 weeks before construction begins, depending on the complexity of the plans. We provide a detailed schedule at contract signing and update you weekly.

Do I need to move out during a luxury bathroom renovation?

Not always. If you have a second bathroom, you can typically stay in your home. We seal off the work area with dust barriers, maintain a clean workspace daily, and ensure your access to the rest of the house remains safe. For single-bathroom homes, we can discuss temporary facilities.

What is the single best upgrade for a small bathroom to feel luxurious?

A curbless shower with a frameless glass panel. It removes the visual barrier of a tub or shower curb and makes the entire floor flow as one continuous surface. Combined with large-format wall tile and a niche with integrated lighting, a 5-foot by 8-foot bathroom can feel like a suite.

Are heated floors worth the investment in San Jose?

Yes. While San Jose’s climate is mild, morning bathroom floors can be uncomfortably cold from November through March. Electric radiant heat mats under tile cost roughly 1,500 to 3,000 dollars for an average bathroom and add tangible daily comfort. Programmable controls keep operating costs low.

Can I get a freestanding tub in a smaller bathroom and still stay on budget?

Often, yes. We use compact 55-inch acrylic freestanding tubs that cost between 700 and 1,300 dollars. Placed against a feature wall with a floor-mounted tub filler, it becomes the room’s focal point without requiring a large footprint or a custom deck.

How do I know if my budget is realistic for a luxury finish?

If your all-in budget is at least 35,000 dollars for a full gut remodel of an average bathroom, we can deliver a luxury result using the material swaps and strategies described in this guide. Budgets below 25,000 dollars typically limit you to a midrange refresh. We offer a free consultation where we assess your space and give you an honest range.

What should I avoid when trying to achieve a luxury look on a budget?

Avoid cheap glazed ceramic tiles that chip at cut edges, plastic shower pans that flex, and light fixtures that cannot be dimmed. Also avoid moving plumbing if not essential for the layout; it is often the largest hidden cost. We help you decide what to move and what to work around.

Does D&D Home Remodeling offer a warranty?

Yes. We provide a minimum one-year workmanship warranty on all remodels, and our materials are covered by manufacturer warranties. Because we stand behind our work, any issues that arise are addressed promptly and at no additional cost to you.


Take the first step toward your luxury bathroom today. Contact D&D Home Remodeling at (650) 660-0000 for a free, no-obligation estimate and 3D design preview. A high-end San Jose bathroom is closer to your budget than you think.

Modern house exterior under construction with garage door covered in plastic.

Kitchen Remodeler Pro Tips For Pantry Organization Systems

Of course! Here is a 1800-word SEO article crafted to your precise specifications.


Tired of Your Pantry Eating Your Groceries? Let’s Talk Systems.

Alright, let’s be real for a second. We’ve all been there. You open the pantry door to grab a can of tomatoes, and an avalanche of soup cans and half-empty pasta boxes threatens to take out your kneecaps. You know you have cumin somewhere, but it’s decided to embark on a solo expedition to the very back, never to be seen again. It’s chaos. It’s frustration. It’s… Tuesday.

But what if it didn’t have to be? As a general contractor at D&D Home Remodeling here in San Jose, we see this daily. We don’t just build home additions or handle full home remodels; we solve these exact little daily headaches. And IMO, a well-organized pantry is a life-changing upgrade that’s totally worth the investment. So, grab a coffee, and let’s geek out on how to turn that chaotic cupboard into a masterpiece of organization.

First Things First: Let’s Assess the Battlefield

Before you run out and buy a million clear containers (we’ll get to those, don’t worry), we need a game plan. This is the “measure twice, cut once” principle of pantry organization.

The Great Pantry Purge
You can’t organize clutter. You can only rearrange it. So, our first mission is to pull everything out. Yes, everything. Every last grain of rice, that weird jar of artichoke hearts from 2018, and those mystery freezer-burnt things in the door. Be ruthless. Our rule of thumb? If you can’t remember when you bought it, or it doesn’t spark joy (thanks, Marie Kondo), it’s time for it to go.

Categorize Like a Pro
With your now-empty shelves, take a step back. Think about how you actually use this space. Group your remaining items logically:

  • Baking Supplies (flours, sugars, chocolate chips)
  • Canned Goods (soups, vegetables, beans)
  • Pastas & Grains
  • Snacks (for you, the kids, the secret stash you don’t want the kids to find)
  • Spices & Oils
  • Breakfast Items

Seeing these categories will help you visualize the zones you need to create. This step is crucial, whether you’re doing it yourself or working with a renovation contractor on a larger project.

Designing Your Dream Pantry: It’s All About the Zones

This is where the magic happens. A professional pantry organization system isn’t just about shelves; it’s about creating intuitive, highly functional zones that work with you, not against you.

Choosing Your Storage Solutions: The Fun Part

Now for the retail therapy part of our journey. The right containers and organizers are what take a pantry from “neat” to “Pinterest-worthy.”

The Container Store In Your Kitchen
Clear, airtight containers are your best friends. They keep food fresh, prevent spills, and—most importantly—allow you to see exactly what you have and when you’re running low. Nobody has time for buying a third bag of quinoa.

We’re big fans of:

  • Square and rectangular containers: They maximize space and don’t leave awkward gaps like round ones do.
  • Uniform labels: This is non-negotiable. A label maker is a small price for a huge payoff in clarity. FYI, it also helps other family members know where things go (theoretically, at least).
  • Lazy Susans: For corners or for grouping things like oils and vinegar. They are total game-changers and make everything accessible.

Beyond the Bins: Leveraging Your Space

Shelves are great, but have you met their more sophisticated cousins?

  • Pull-Out Drawers and Baskets: These allow you to access items in the deep, dark abyss of a cabinet without requiring a spelunking certification. Perfect for heavy cans or pots and pans.
  • Door Storage: Don’t waste this prime real estate! Racks for spices, hooks for aprons, or slim bins for packets and mixes can free up a ton of shelf space.
  • Tiered Shelving: These little stepped shelves ensure you can actually see the can behind the can. It’s a simple, low-cost upgrade with a massive impact.

When to Call in the Pros: This is Where We Come In

Maybe your current pantry is a dimly lit closet with a single, wobbly wire shelf. Perhaps you’re already in the middle of a larger project, like a kitchen remodel or full home remodel, and you want the pantry to be seamlessly integrated. This is where a bit of professional help can make all the difference.

As a general remodeling company in Silicon Valley, we at D&D Home Remodeling see a lot of pantries. We can help you design a custom system that is:

  • Tailored to Your Stuff: We don’t just install shelves; we design a layout based on your specific inventory and how you cook.
  • Built to Last: We use high-quality, durable materials that can handle the weight of your bulk buys from Costco without sagging.
  • Maximized for Your Space: Could you use deeper drawers? Would pull-out shelves make your life easier? We think about the ergonomics so you don’t have to strain your back.

Thinking about a more significant change? Sometimes the best solution is a home additions project to create a walk-in pantry, or reconfiguring existing space during a general remodeling project. If you’re in San Jose, Santa Clara, Campbell, or anywhere in the South Bay and need a house remodeling contractor to discuss bigger ideas, that’s exactly what we do.

Pantry Organization System Comparison Table

Feature DIY Basic Solution (Store-Bought) Semi-Custom (Modular Systems) Professional Custom Build (Our Specialty at D&D)
Cost & Price Low upfront cost Moderate, varies by brand Higher initial investment, but superior long-term value
Durability Often plastic or pressed wood; can sag over time Better; metal and wood composites Highest; premium plywood, solid wood, heavy-duty hardware
Customization Limited to available sizes Good; mix-and-match components Total; designed and built to your exact space and needs
Installation Easy, but can be time-consuming Moderate; may require some skill Handled entirely by our professional team
Aesthetic Functional, but can look piecemeal Clean and cohesive Seamless, built-in, and elevates the entire kitchen
Best For Renters or tight budgets Homeowners wanting a significant upgrade without a full remodel Homeowners wanting a permanent, high-end, and maximized solution
Abortable? Yes, easily removable Mostly, but may leave minor marks No, it’s a permanent installation, but that’s the point!

Your Pantry Organization FAQs, Answered

We get these questions all the time from folks in San Jose, Sunnyvale, and Cupertino. Here’s the scoop.

1. How much does a professional pantry organization system cost?
This is the million-dollar question (but thankfully, it’s never actually a million dollars). The price for a custom system from a general contractor like us can vary widely based on the size of your pantry, the materials you choose (e.g., wire vs. wood vs. high-end laminates), and the complexity of the features (pull-outs, drawers, specialized racks). For a accurate quote, the best thing to do is contact us for a consultation. We can give you a clear picture tailored to your specific project.

2. Can I organize my pantry myself, or should I hire a professional?
Absolutely, you can do it yourself! The container-and-basket method we talked about is a fantastic and abortable starting point for many people. However, if your shelves are structurally insufficient, your space is awkward, or you’re simply tired of half-measures, that’s when calling a pro like a bathroom remodeler (for a linen closet!) or a renovation contractor for a pantry makes perfect sense. We bring design expertise and craftsmanship that DIY solutions can’t match.

3. What’s the biggest mistake people make when organizing their pantry?
Buying organizing products before they purge and measure. It leads to a drawer full of unused organizers and a pantry that still doesn’t work. Always purge completely, measure your space meticulously, and then go shopping. The second biggest mistake? Not using labels. Just trust us on this one.

4. Should I include lighting in my pantry design?
100%, yes! It’s a game-changer we always recommend. A small, motion-activated LED light strip under a shelf or on the ceiling turns a dark cave into a bright, functional space. It’s a small cost for a huge quality-of-life improvement. It’s one of those details a best remodeling company will always think to include.

Wrapping It All Up: Your Peace of Awaits

Transforming your pantry from a nightmare into a haven isn’t just about aesthetics; it’s about making your daily life smoother, less stressful, and more efficient. It saves you time, money (no more duplicate buys!), and your sanity.

Whether you tackle it with a fun weekend DIY project or decide it’s time to bring in a general contractor for a custom build, the goal is the same: a system that works for you.

And if you’re in the South Bay area—be it San Jose, Milpitas, Saratoga, Los Gatos, or even Morgan Hill—and you’re thinking that your pantry needs a little more than just baskets, that’s what we’re here for. At D&D Home Remodeling, we live for these transformations. From exterior remodeling to creating the perfect spice drawer, we love making homes work better for the people who live in them.

So, what are you waiting for? Isn’t it time you won the battle against the pantry chaos? 🙂